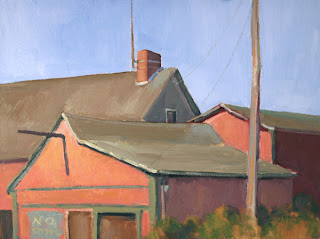
Thanks to a Shirl Smithson Scholarship from the Oil Painters of America, I'm taking a workshop with Lois Griffel this week at the Acadia Workshop Center in Southwest Harbor, Maine. It's a workshop I've wanted to take ever since reading her book, Painting the Impressionist Landscape (Watson-Guptill, 1994.) I allow myself one workshop a year, and this is the one for 2008.
When we arrived on Sunday, we were worried about Hurricane Kyle, which was due to hit Downeast Maine early Monday morning as, at best, a near-Category 1 storm. However, miracles do happen, and late in the evening Kyle suddenly staggered east, sparing us. Monday morning came with a gorgeous sunrise, worthy of any Impressionist's brush.
But even with the unexpected good weather, we spent the morning in the workshop center going over material that would be our foundation for the week. You'd think we all knew the color wheel by now, but I found myself learning some new things. For example, Lois splits the wheel temperature-wise down the middle from Red to Green, which gives these two colors an interesting property - they can be either cool OR warm. In a sense, this makes each half of wheel MORE than half and thus expands its color range.
I should say a word about Lois. She studied at the Art Students League of New York with Ray Kinstler, Burton Silverman and Harvey Dinnerstein. In 1975, she moved to Provincetown, Massachusetts, where she became good friends with Henry Hensche. Not long afterward, she was chosen to become the director of the Cape Cod School of Art, third in line after Charles Hawthorne and Hensche. In a sense, this was a form of apostolic succession: Lois learned from Hensche, who learned from Hawthorne, who founded the school in 1899. Both Hawthorne and Hensche were considered luminaries of the American art world in the early part of the last century and still hold that position today. Lois was forced to close the school in 2000 because of economics. Today, she lives in Arizona. For more on her and the Cape Cod School of Art, visit www.loisgriffel.com.
After lunch, we went to a nearby bog to try out her basic idea. Each large value mass contains more than just the local color. The longer you look, the more you'll see complements. Complements or, as she calls them, "vibrating colors," are what make the landscape come alive. Skies may contain not just blue but pink. (Why not the true complement, orange? She likes to save that for the sunlit areas, since they are even warmer than the sky. Pink isn't quite as warm as orange.) The shrubby plants that make up the bog contain not just yellow ochre but also bits of violet. In applying these "vibrating colors," it doesn't matter what order you apply them in. You can start either with local color or any of the other colors. Today, for example, she had us start our skies with pink and gradually work blue back into them.
Below is my 8x10 view of the bog. Lois calls the sketches we did today "starts." They are basically underpaintings and can serve as a good base for what could become a finished painting with more time and observation.
For this session, we were working "alla prima." She remarked that the difference between the definitions of "plein air" and "alla prima" has gotten a bit fuzzy. "Plein air" does not necessarily mean "alla prima." With alla prima, of course, you're working wet-into-wet and finishing the painting in one session. With plein air, you may finish a piece over several sessions. She let us know that both Hawthorne and Hensche actually let their underpaintings dry before continuing to work on them. This allowed the painters to achieve the purest, richest color. It's so easy to stir up the complements and muddy the color when working alla prima. One could use a knife to paint with, since that stirs up the paint much less. In fact, Lois painted for many years exclusively this way, but now has started to use a brush for a softer look.
More to come!
Tuesday, September 30, 2008
Thursday, September 25, 2008
Autumn Light
In my mind, there's nothing finer than painting in the autumn. I love to be out on a warm afternoon when the grasshoppers are singing their last songs and the sun sets a golden fire in the fields. This week, I went to one of my favorite wet areas, a marsh near Eagle Hill Bog, to paint the marsh grasses. The trick was to make the grasses incandescent. I kept the shadowed parts of the grasses red and warm, warmer than the sunlit tops, and then made sure the highlights on the tops were the brightest extreme in the painting.
"Autumn Splendor" 8x10, oil
SOLD
By the way, below are some clips I found of grasshoppers singing. Close your eyes and you can perhaps feel a bit of what I experience when I'm out painting:
Saturday, September 20, 2008
Two Countries, One Bay Studio Tour
This is the weekend of our annual "Two Countries, One Bay" studio tour. Over 50 artists have opened up their studios to the public in the Passamquoddy Bay region, including the Maine towns of Lubec, Eastport and Calais and, in New Brunswick, St Andrews, Deer Island and Campobello Island. Although the tour covers a vast region that is nearly impossible to do in just two days, many attempt it! It's a great opportunity to visit with painters, woodworkers, potters and others in private studios to see how they work.
For my part of the tour, I'm doing pastel painting demonstrations outdoors. The demos are small - only 5x7 -- so I can talk to people and visit with them without getting mired down in a bigger piece. We've got some beautiful weather this weekend, and it's fun to be outside painting during the tour.
Below is a picture of me out with the easel, as well as a shot of the two pieces-in-progress. The top painting was done at 9 a.m. and the bottom, around 2 in the afternoon. You can really see the difference in the quality of light.
"Big Spruce at Dawn" 5x7 pastel -SOLD
"Looking Up" 5x7 pastel
Thursday, September 18, 2008
Illustrative v. Representational
Representational paintings don't necessarily tell a story. More often than not, especially in the case of the pure, abstracted landscape without architecture or figures, they are meant to communicate a feeling or mood. Most of my work is of this nature, as in this example:
Illustrative paintings don't necessarily tell a story, either -- even though we often think of illustrations as an accompaniment to texts such as a novel. Sometimes, they are meant to depict a subject accurately, such as a person's face in a portrait. Either way, whether they tell a story or show a portrait, they incorporate detail evenly throughout the painting. The abstracted landscape, on the other hand, will sacrifice detail at the expense of design. Detail is not important to an abstract piece.
Some illustrative paintings are obviously meant to illustrate stories, such as the work of N.C. Wyeth. (See examples at http://www.bpib.com/illustrat/wyeth.htm ).
Others, such as the egg tempera work of his son, Andrew Wyeth, are illustrative first in that every detail is rendered exquisitely. Stories also are often implied or even explicitly stated. I have in mind something like "Christina's World," in which we see a figure in the landscape looking across a vast field to a house. Even if you don't know the story behind the crippled Christina, the painting will conjure up some sort of tale in the imagination. (Here's this painting: http://www.moma.org/collection/browse_results.php?object_id=78455 )
On the other hand, Andrew also does very abstract watercolors, many of which imply no story or intent to depict the landscape nature accurately but simply suggest a mood. (See http://www.tfaoi.com/newsm1/n1m153.htm.) These are some of my very favorite pieces by him. Most are are wild and unlabored. Detail has been ignored, but design and color remain the foundation of these paintings.
Tuesday, September 16, 2008
Pastel Nocturne
I've never done a night painting in pastel, so I thought I'd give it a try. Unlike oil painting at night, you don't have the color mixing issue. (In the glow of my headlamp, Ultramarine Blue oil paint looks a lot like Alizarin Crimson oil paint, and it's mostly because I always arrange my palette in the same way that I can tell them apart.) But you do have the color selection issue -- which is, in my mind, almost as difficult.
We had a beautiful full moon this morning, and when I woke around 4, I decided to take advantage of it. I loaded up my pastel gear and hiked down to our beach through the apple trees. The ripe apples seem even more fragrant in the night. As I moved out into a clearing, I saw Friar's Head, lying in the distance like a black slab in a silvery sea.
I set up my pastel box. I keep it well-organized. It has six sections, one for each color family. I divide each section with cool colors at one end and warm colors at the other. In addition, I sort the pastels in each section by value. (See the photo below.) With this level of organization, you'd think it'd be a piece of cake in the dark to find the correct cool, dark purple I need. Not so - there are subtle but important variations among those cool, dark purples. They were almost impossible to see under my headlamp.
I found myself looking at the scene, deciding (or guessing) what color a certain shape before me was, and then reaching into the box where I remembered that particular color should be. But was it the correct cool, dark purple? The best I could do was get right the color family, the temperature and the value. Whether it was a slightly redder purple or a slightly bluer one was hard to tell. But this isn't a problem unique to pastel; it's the same with mixing oil paint in the dark.
Unlike oil paint, however, which stays on the palette where you put it, pastel sticks don't. I have a little tray (my "working palette") that I put my pastel sticks in as I work so I can find them again easily. Well, they rolled around and got jumbled up a bit. Oops! Is this the purple or the green? I had to work very hard at keeping the pastel sticks that were in use separate.
I ended up focussing more on value than anything and tried to approximate the temperatures. Even so, I was pretty satisfied with the result. Here's the painting after a few minor tweaks in the studio:
"Friar's Head, Moonlight"
5x7, pastel, en plein air - SOLD
Friday, September 12, 2008
Underpainting - Burnt Sienna + White
I've been finishing up a few illustrations to round out my new book, Backpacker Painting: Outdoors with Oil & Pastel. One approach I wanted to illustrate was underpainting with a mixture of Burnt Sienna and white. Typically, painters may use just Burnt Sienna, thinned as needed, to block in the major value shapes in the underpainting stage. This certainly is the most economical route since it doesn't involve any other paint. But by adding white, it's possible to lessen the impact of the Burnt Sienna on the following layers. (I'm talking exclusively about painting wet-into-wet.) Burnt Sienna alone can lend a somewhat gaudy orangish cast to the finished piece. The addition of white, however, dulls the Burnt Sienna a bit, effectively diluting it. Using white also allows you to pre-mix your values, giving you more control over them.
I first mixed up four different values, using Burnt Sienna and Titanium-Zinc White. The final pile is just straight Burnt Sienna.
Finally, I finished off the painting with true color, adjusting values as needed. Besides Burnt Sienna and white, I also used Cadmium Yellow Light and Ultramarine Blue. The painting has a very warm feeling, so I added some areas of pure Ultramarine Blue or tints of it to add areas of relative coolness.
"Spruce Point, Low Tide" 8x10, oil, en plein air
SOLD
SOLD
Saturday, September 6, 2008
Doug Dawson Workshop - Days 4 & 5
The last two days of the workshop entailed a great deal of painting, interspersed with lunches and dinners filled with "art talk" and ending with critiques. What we learned from Doug would fill a book - and in fact, he is working on a book. (He says he's not quite ready to submit it to a publisher yet, but I think the world is ready. His earlier book, Capturing Light and Color with Pastel, has been out of print for some time.)
(By the way, I contacted Gamblin Artist Colors about my issue with oil pastels as an underpainting medium for traditional oils. Here's what they say: "Oil pastels are made with pigments bound in wax and a non-drying vegetable oil. If the oil pastel was thinned with OMS to the point where the vegetable oil was dissolved completely, leaving a thin wash of pigment behind, there may not be a problem painting oils on top of this. However, if the oil pastels were used alone, the non-drying oil binder may be trapped underneath the drying oil paint layers. This could cause adhesion problems in the future of the work. " I made sure to use a lot of OMS, so I'm safe!)
This was not your typical workshop. In a mentoring workshop such as this, students are expected to work in the field without hand-holding. This frees up time for the mentor to give out lots of information that ordinary workshops don't have time for. Everyone was very satisfied with the experience and said they'd definitely partake in something like this again.
The workshop is now over, and Doug and Sue are working their way west to teach a workshop in New York state. Thanks, Doug and Sue!
Thursday and Friday we stayed on Campobello Island and painted in several choice spots. We made sure to work hard on our value designs first. "I never used to do them," Doug said, "until I started teaching them. Then I found that they really do improve your compositional skill dramatically." In addition, we thought hard about color choices. On overcast days, Doug likes to start with a sheet of paper toned a cool violet-red to give the painting a cool look; on sunny days, he starts with a sheet toned a yellow-orange for warmth. In my oil paintings, some of which I underpainted with oil pastels, I used a similar approach.
"Salt Marsh Overcast" 9x12, oil - contact Michael for purchase
(By the way, I contacted Gamblin Artist Colors about my issue with oil pastels as an underpainting medium for traditional oils. Here's what they say: "Oil pastels are made with pigments bound in wax and a non-drying vegetable oil. If the oil pastel was thinned with OMS to the point where the vegetable oil was dissolved completely, leaving a thin wash of pigment behind, there may not be a problem painting oils on top of this. However, if the oil pastels were used alone, the non-drying oil binder may be trapped underneath the drying oil paint layers. This could cause adhesion problems in the future of the work. " I made sure to use a lot of OMS, so I'm safe!)
"Two Spruces" 9x12, oil - contact Michael for purchase
The workshop is now over, and Doug and Sue are working their way west to teach a workshop in New York state. Thanks, Doug and Sue!
Thursday, September 4, 2008
Doug Dawson Workshop - Days 2 & 3
Day 2 with Doug was spent mostly painting. We returned to West Quoddy Head, one of the locations we sketched and photographed on Monday. The idea was to take the designs we worked so hard on and turn them into paintings. Doug is very big on value sketches - all of your design issues should be worked out in this stage. (His thumbnail sketches tend to be a bit bigger than mine - a whole page of a small sketchbook.) The work we did before was indeed valuable, and it made the painting go a whole lot better because you weren't fussing with composition while trying to get color right.
On this day, I somehow lost the 6B drawing pencil I use to sketch with. I had a small set of oil pastels with me, so I did a design sketch with a dark brown. I haven't used oil pastels before. I'd brought them along to see if I could use them for color thumbnail sketches. I'd heard that you can turn them into a wash with mineral spirits, so an idea came to me: What if I used them to block in the composition of my painting? So I tried it - and was very pleased with the results. I particularly enjoyed the greater control I had over the mark-making in this underpainting stage. A brush sometimes seems to have a mind of its own.
I tried this again on Day 3, and remembered to take sequence photos so you can see how it went. Here is the block-in, followed by the OMS wash stage, and the final painting. I need to state here that Doug does not use oil pastels, and both of us were wondering just how archival this method is. Will the painting slide off the panel in a month? (Let me know your thoughts!)
And finally, here is Doug on Day 3, painting a little building:
Tuesday, September 2, 2008
Doug Dawson Workshop - Day 1
This week, I'm hosting a Doug Dawson workshop. I've had lots of great teachers over the years, and Doug is one of the very best. He's also a master artist. In a couple of weeks, he will be inducted into the Pastel Society of America's Hall of Fame at the annual PSA exhibition. For more on Doug, you can visit his web site: www.dougdawsonartist.com.
This is a mentoring workshop, which means that we're inside Doug's head for the week, working with him to see how he paints, all the way from choosing subject matter to researching a composition and beyond. On Monday, we visited several locations near Lubec, Maine, to look into painting possibilities. Along with taking photographs, we did a great deal of reference sketching to explore compositions. We'll go back to these locations later this week to paint. Here is a page from my sketchbook:
Later in the day, Doug went back to one of the locations (West Quoddy Head) to work up one of his earlier sketches into a painting. We were given the option to paint, too, but we instead chose to sit and watch him work. Doug, ever the teacher, kept up a continuous and fascinating narrative as he painted. It would have been a great opportunity for a video camera!
Here's Doug working on his pastel painting. He started off with using reds and oranges for the initial block-in, moving to real color later.
Four more days to come!
Subscribe to:
Posts (Atom)
More Art & Painting Blogs | (List Culled Periodically of Non-Posters!)
-
-
Pop Culture IS Culture1 day ago
-
-
Two Art Podcasts5 days ago
-
-
-
-
-