Authentically Human! Not Written by AI!
All Content Copyright © Michael Chesley Johnson AIS PSNM
Showing posts with label Extreme Makeover. Show all posts

Sunday, April 9, 2023

Extreme Makeovers for Plein Air Paintings: Sunrise in the Canyon

View in browser

Makeover: "Sunrise in the Canyon"
9x12 oil / sold
Read about my process below

Who hasn't been awed by the sunrise at Grand Canyon?  Many times, I've walked along the rim with a to-go cup of fresh coffee from the Bright Angel snack bar to witness it.  I usually find a little nook away from the other tourists, where I can watch in peace the sun's first warm rays as they paint the canyon walls in golds and reds. 

It's a great moment for photographers.  They line up jauntily at the rim with their tripods, making small talk, waiting for the right second to trip the shutter.  But for painters, it's another matter entirely.  When I try this, I find I have about 20 frantic, intense minutes of trying to block in the general idea before the glow weakens and gives way to a harsh, glaring light. That's not much time to mix paint, apply it, consider it, and make corrections.  You'd be surprised at how big a 9x12 canvas can seem in those few minutes.

And that was my situation when I painted the original piece.  I was reasonably content with it, but it always had a half-finished feeling, like something I might use in the studio as a color reference.  But after looking at it again, I decided the "bones" of a decent painting were there, and it wouldn't take long to take it to the next level.

The sketch was hung up in the mid-values, so I pushed the contrast by adding darker notes around the formation (the "Steamboat") in the foreground and darkened its cast shadow.  I also darkened the shadowed area of the distant canyon and simplified the pattern of cliffs receiving the first bits of sunlight.  I worked in richer color in the Steamboat to pull the eye.  Finally, I sharpened the outline of the cliff on the left to give it more presence and to bring it into the middle ground, making more sense of the depth of the canyon.  Finally, I added touches of purer color here and there throughout the painting to give it more "punch"overall.

Again, my apologies for the lack of step-by-step photos.

Original

Makeover: "Sunrise in the Canyon"
9x12 oil / Available


Sunday, April 2, 2023

Extreme Makeovers for Plein Air Paintings: Above the Canyon

View in browser

Madeover: "Above the Canyon"
9x12 oil / Available
Read about my process below

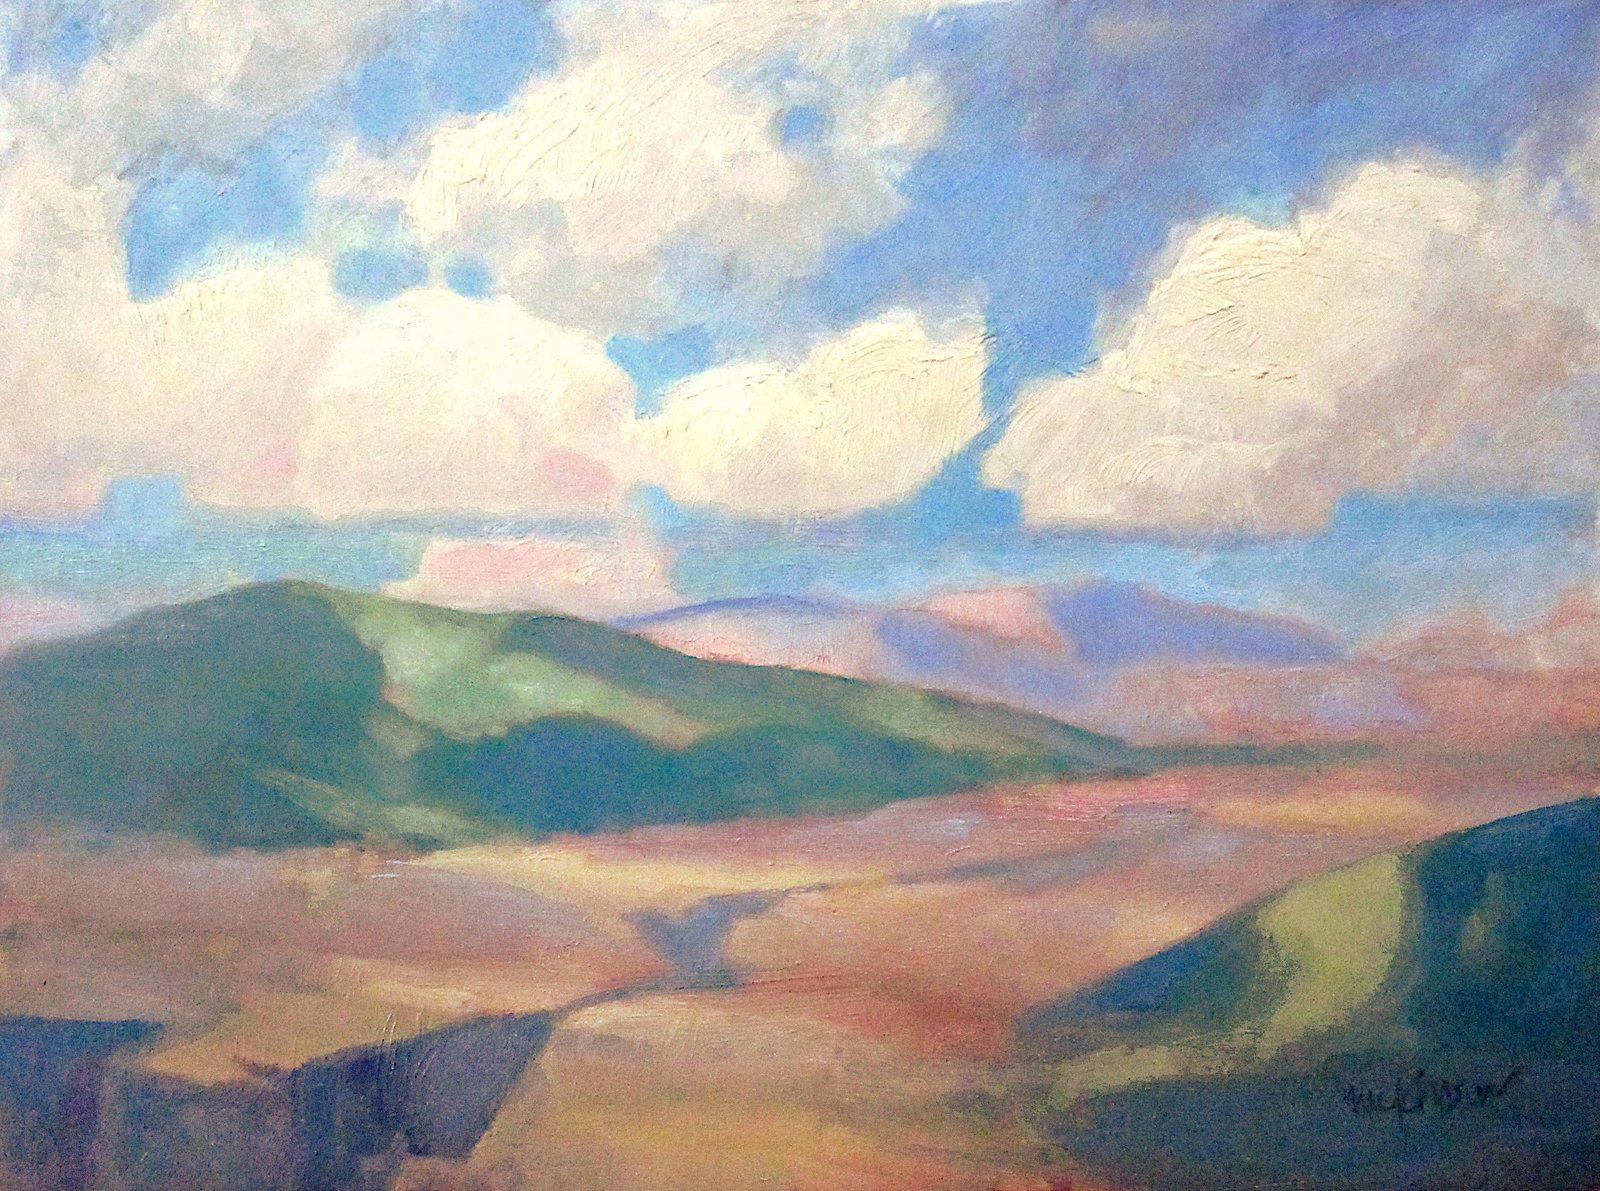
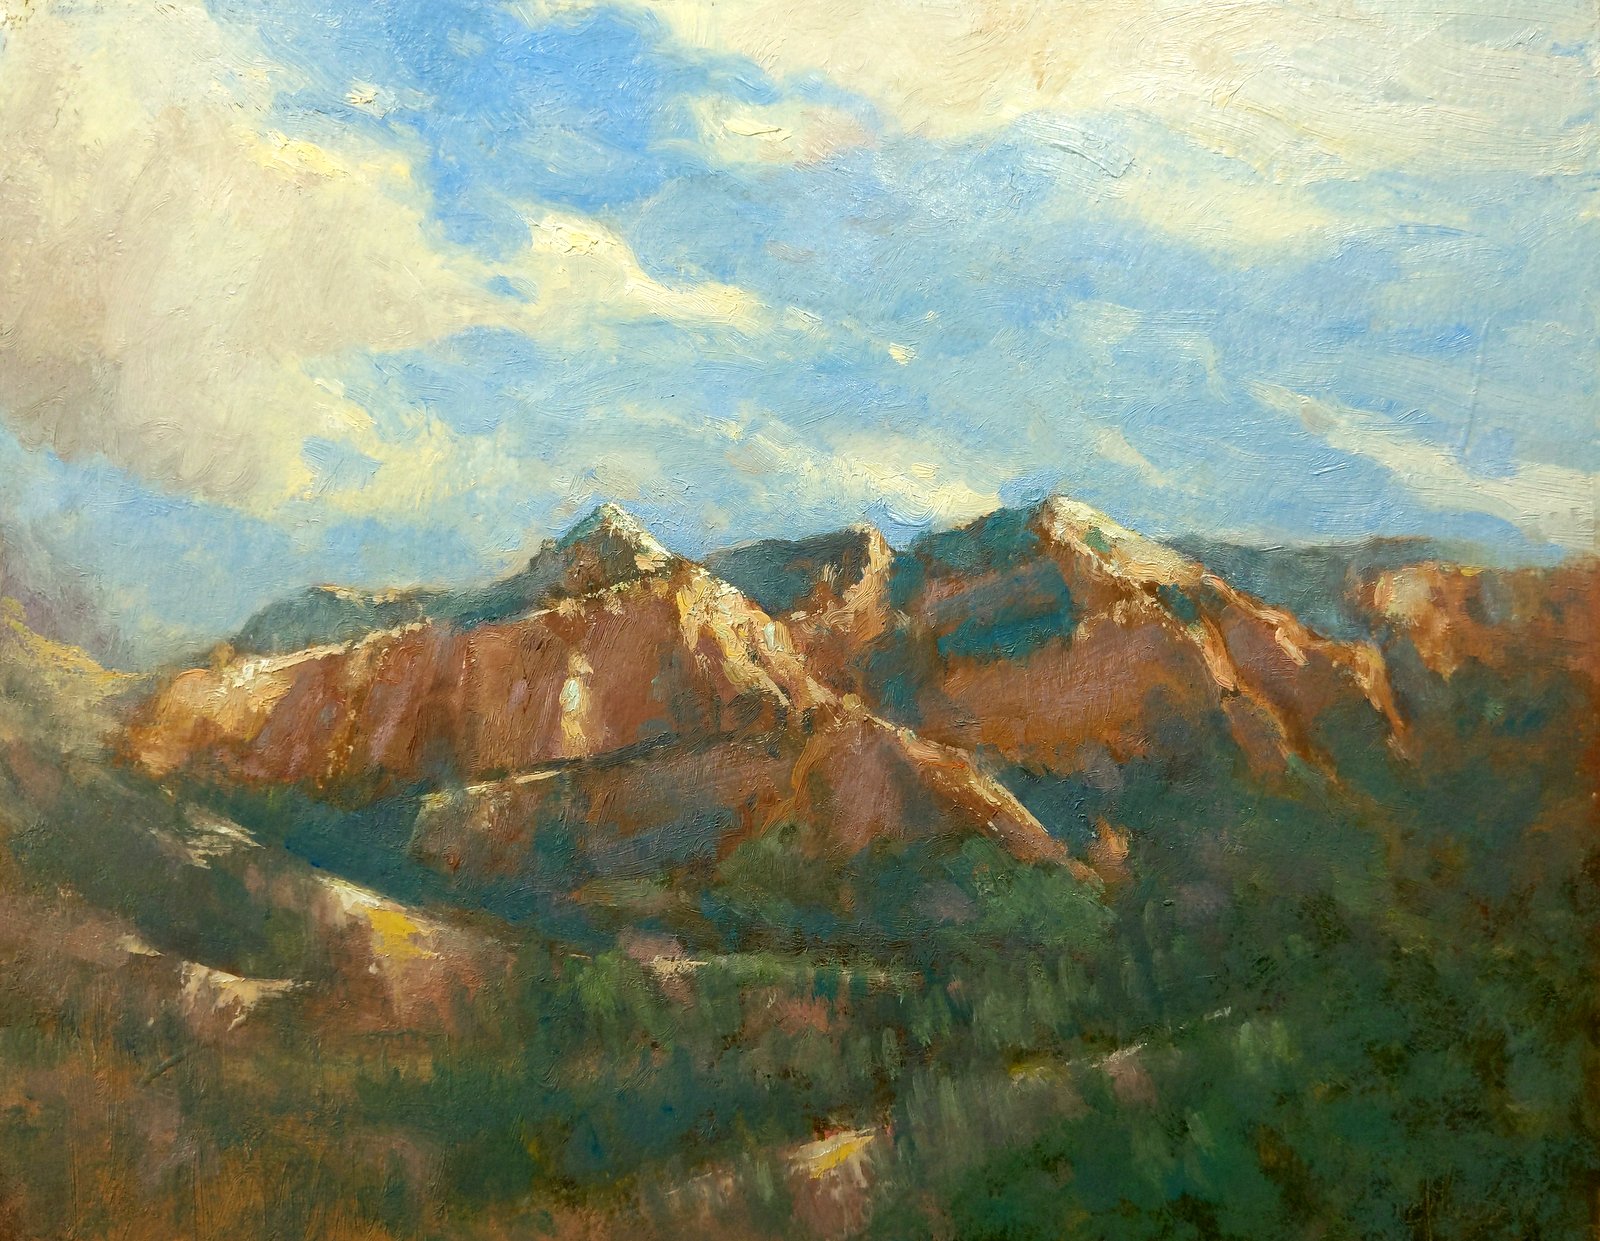
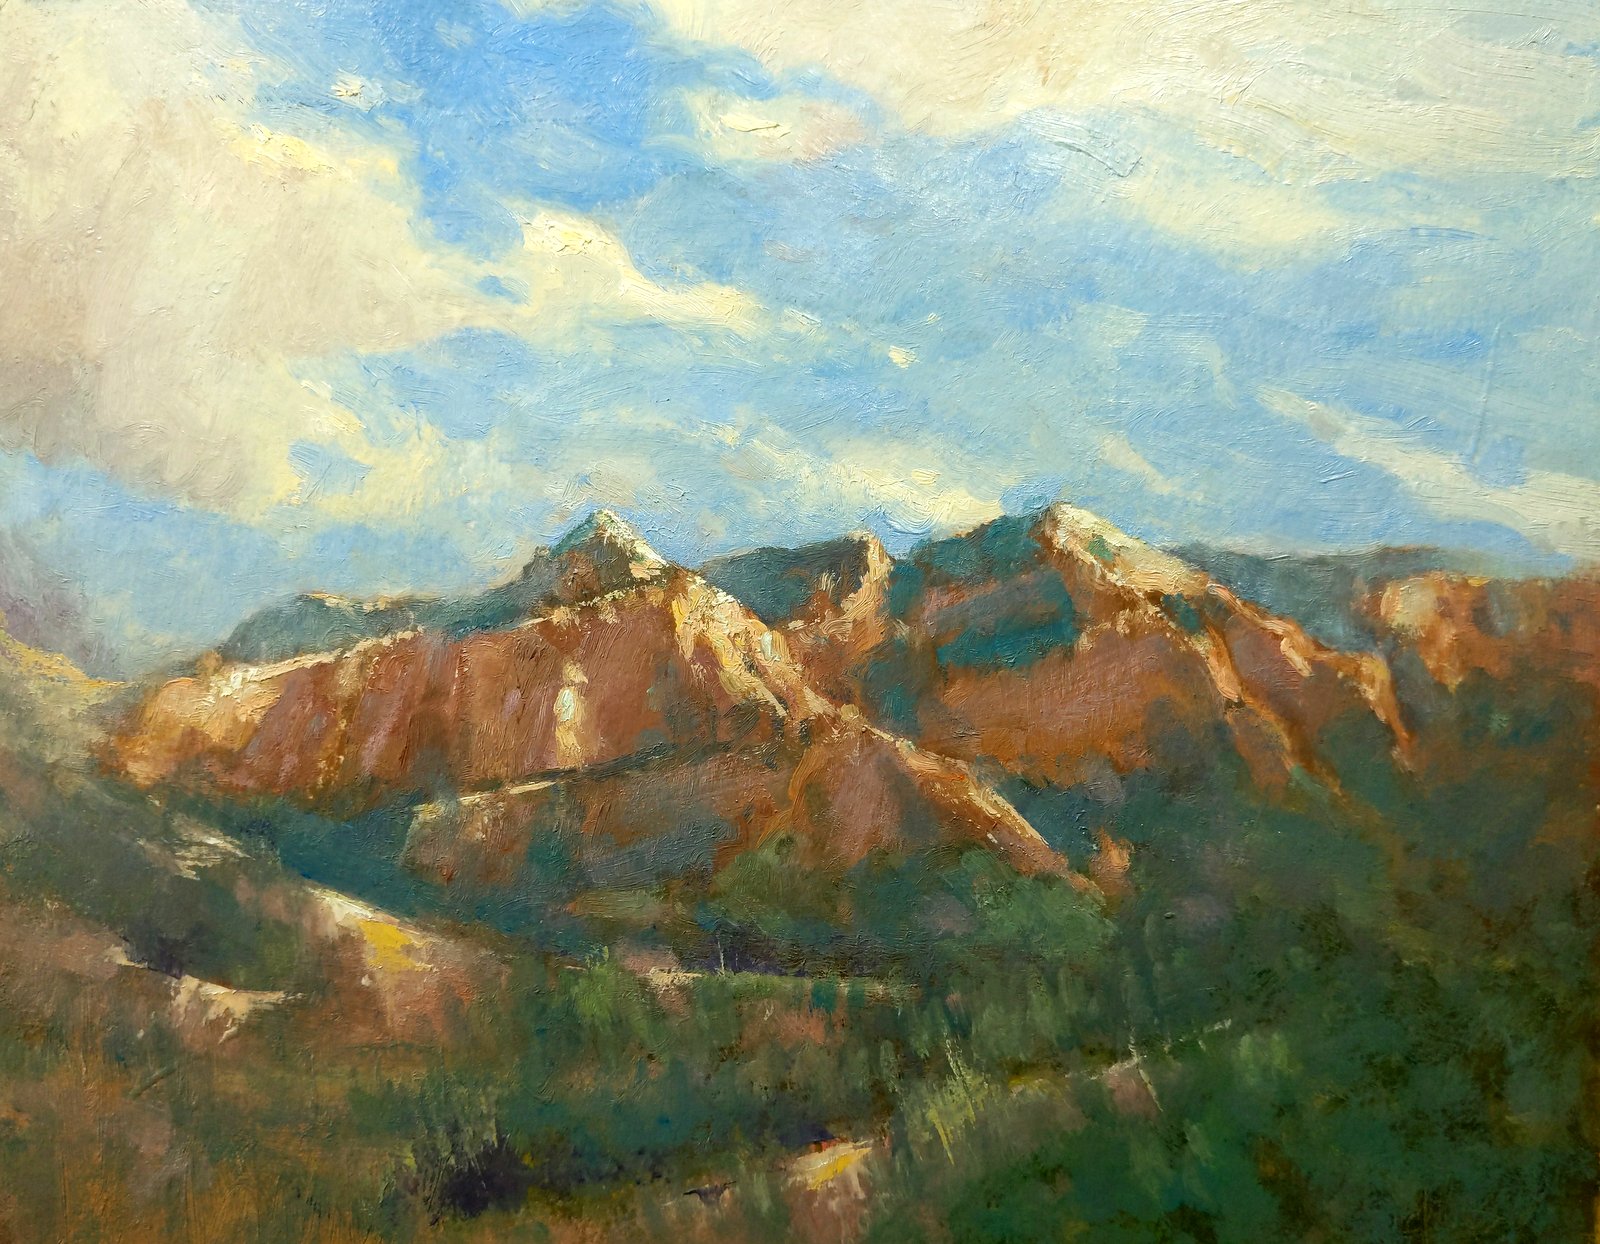
Once in awhile, when I'm out painting, the energy of the scene will take over.  That is, I lose control and am at the mercy of the landscape.  That's what happened with the original painting.  (See below.)  Looking back at it, I'm not sure what caught my eye, unless it was the movement of the clouds and the shadows on the land.  The piece has energy to it, but it's caught in the mid-values, and it has an unorganized complexity that concerns me.  I decided to give it one of my more "extreme" makeovers.

First, I dealt with the cloud pattern.  In the original, you can detect some sort of pattern, but I wanted to strengthen and simplify it.  Using my sky color, I carved back into the clouds, reshaping them.  Next, I wanted to do the same with the shadow patterns on the mountains, so I increased the contrast and simplified those, too.  Finally, the flat ground, I thought, was a muddle.  I decided to add a sliver of canyon.  I've always liked the view of the Rio Grande Gorge in Taos, New Mexico; from a certain viewpoint, it looks like a split in the earth, and I decided to introduce that here.  Although the painting has become a fantasy scene, I much prefer it to the plein air painting that lies beneath it.

By the way, I apologize for the lack of step-by-step photos.  When I'm painting, I so often get carried away and forget.  But I'll tell you  a secret—I'm glad I forget.  It keeps me "in the moment."

Original Plein Air Painting

Extreme Makeover!
"Above the Canyon" 9x12 oil / Available


Sunday, March 26, 2023

Extreme Makeovers for Plein Air Paintings: Spring Freshet

View in browser

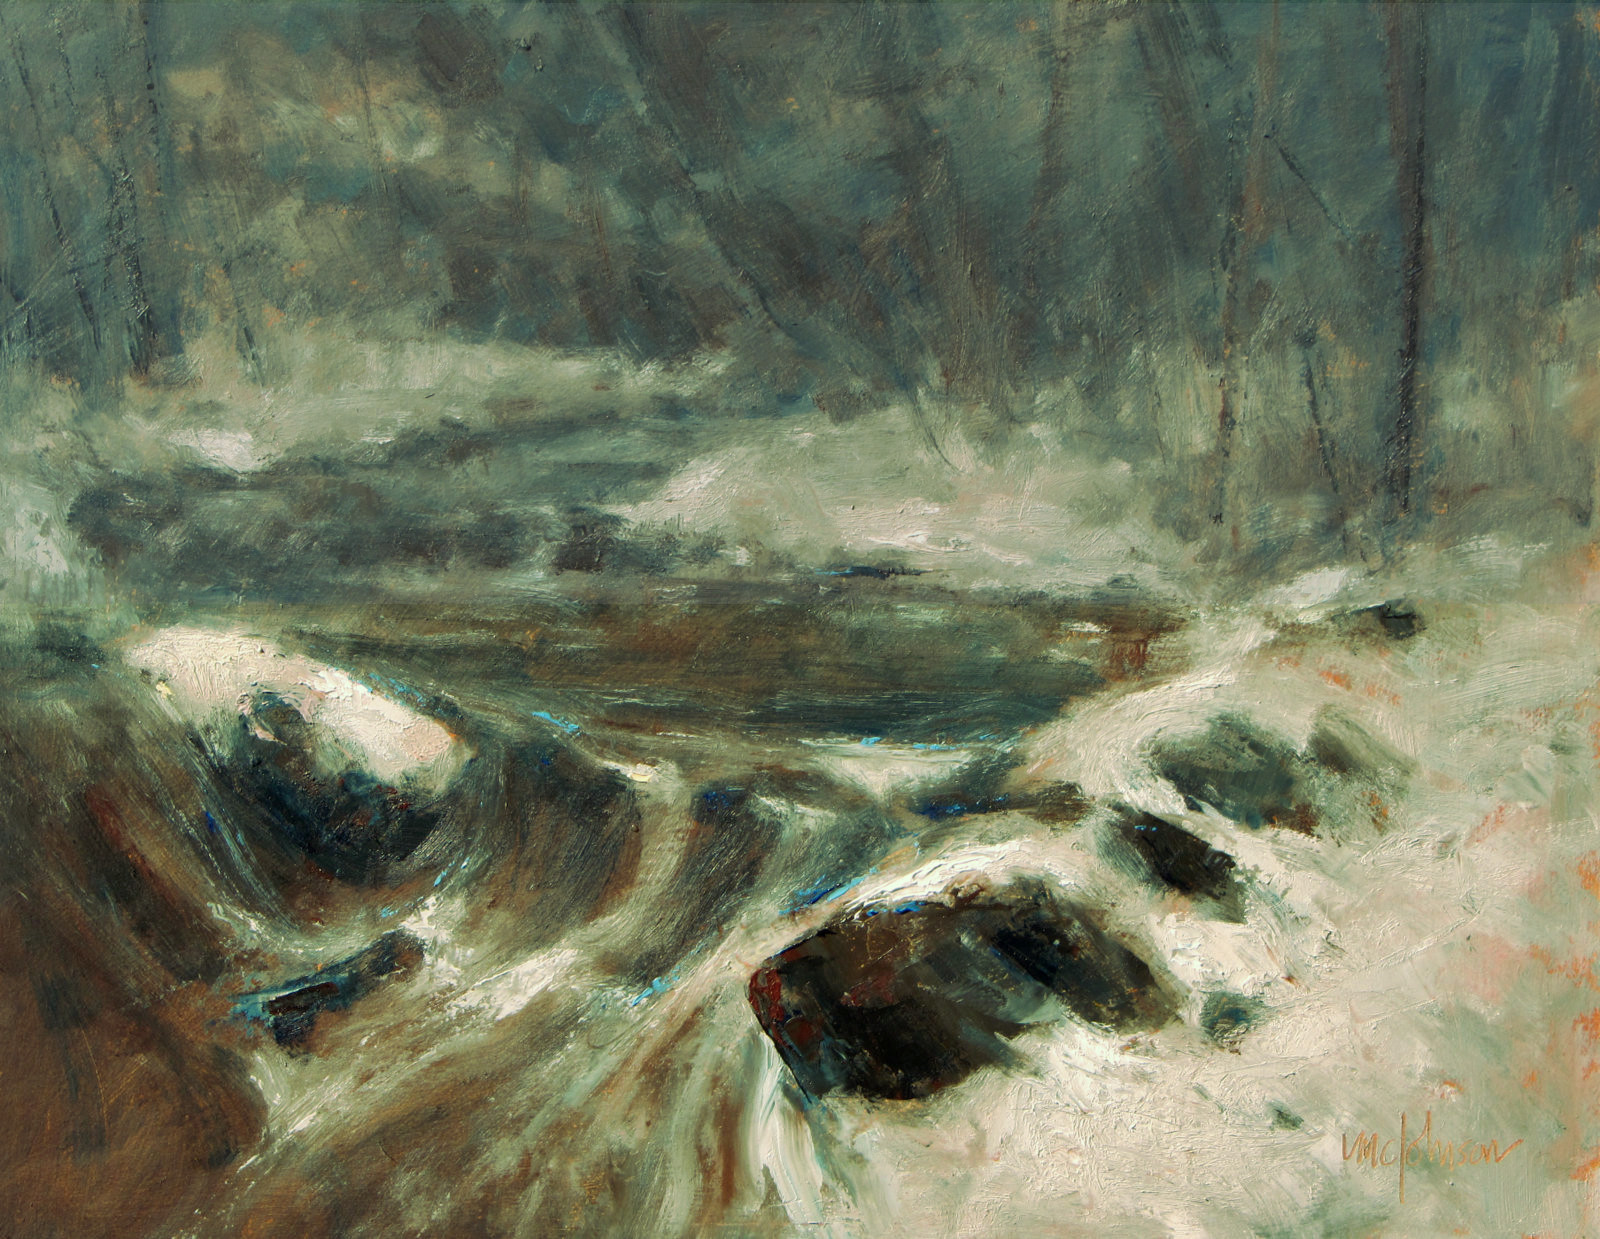
Madeover: Spring Freshet
11x14 Oil / Available
Read about my process below

(Continuing my series of Extreme Makeovers for Plein Air Paintings.)

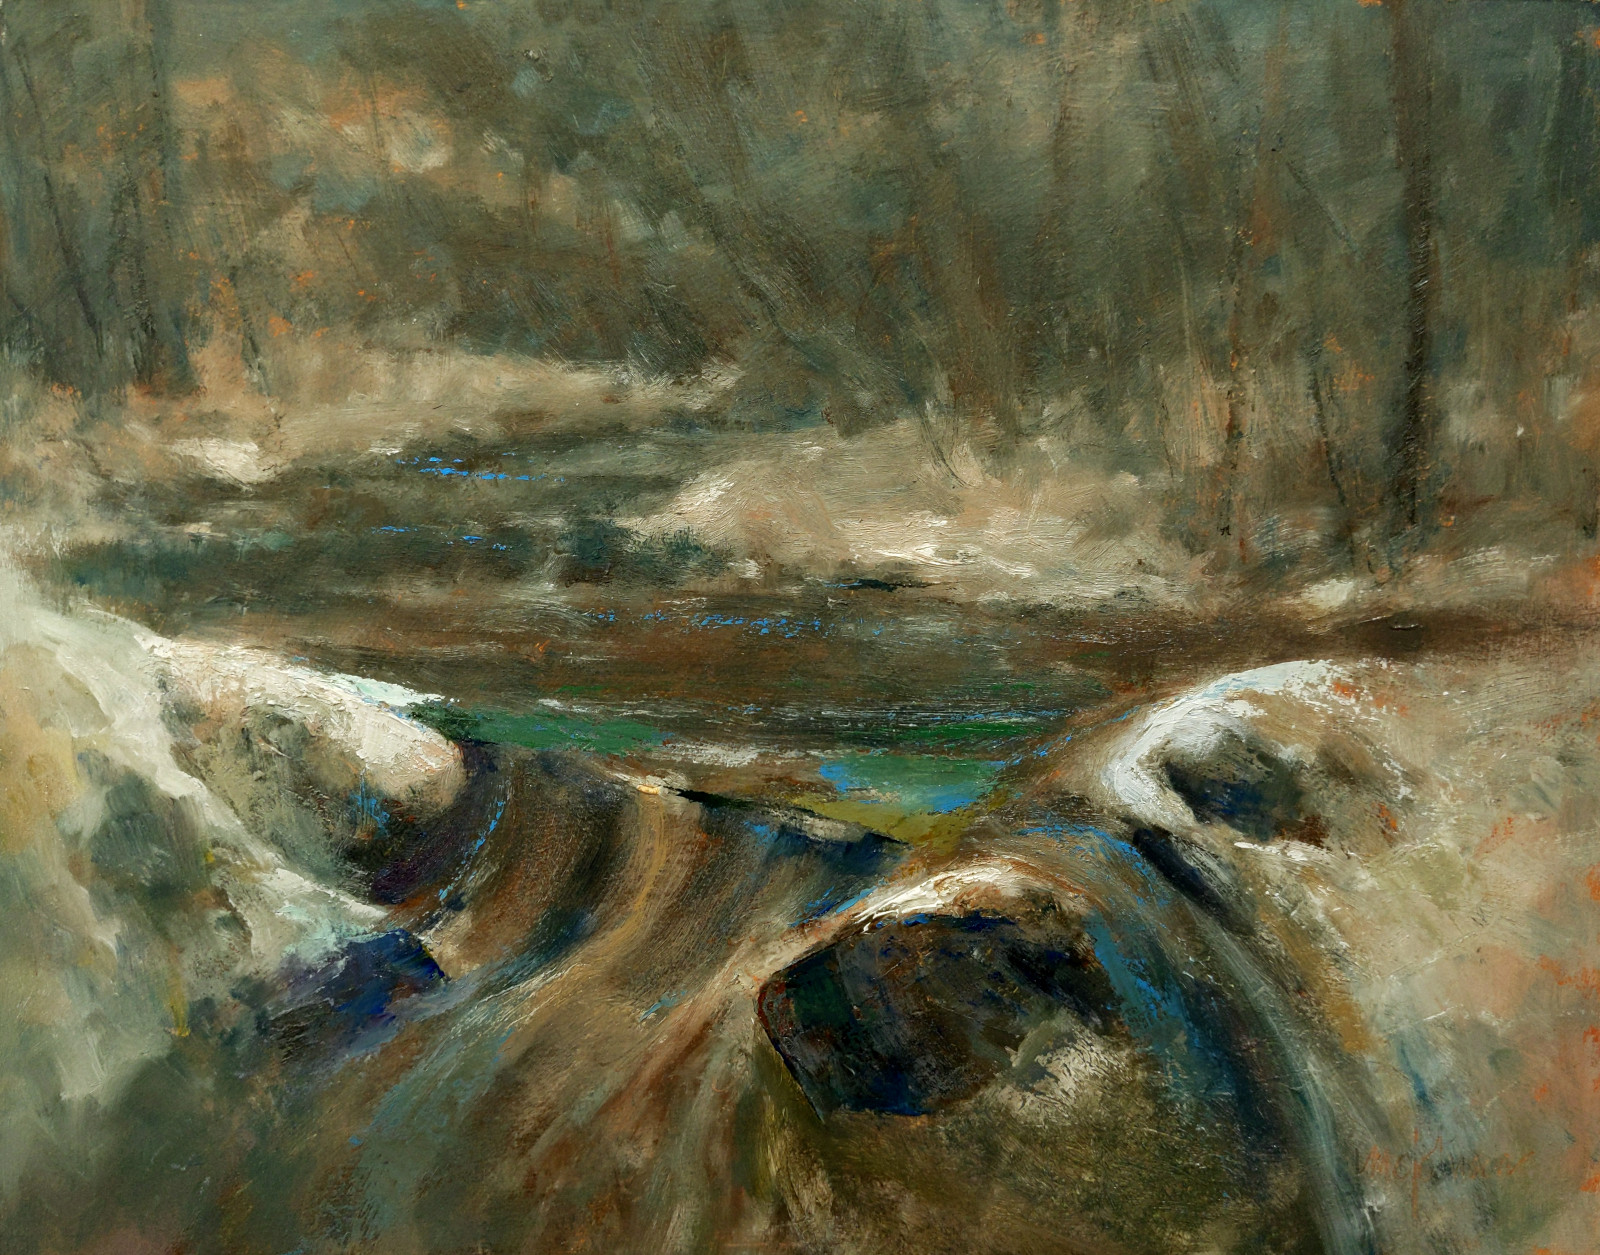
I like to paint snow and especially snow that has gathered around a stream.  I found one such scene not too far from my house, where I was able to set up on a little bridge directly over the creek.  Two things about this scene caught my eye:  the overall softness and the dynamic rush of water.  I was fairly happy with the result, but after having the painting framed and on my wall for a few years, I decided that the pattern of the rushing water swept the viewer right out of the frame. A painting should aim to keep the viewer within its four walls.

Original

1. To help the viewer find a better way up the waterfall, I extend the water to the right, over the rock in the near foreground.  

2. In an effort to keep the viewer from going too far to the left corner, I lighten the water there.  Maybe I should just make it a snowy bank?

3. Now confident about that snowy bank, I paint it in.  It also balances the snowy bank on the right.

4. I add bits of ledge beneath the waterfall.  Rather than being swept out of the painting, the viewer can now crawl up the waterfall and into the scene.  I even give him some extra rocks to hang onto in case he loses his footing. 

5. Finally, I add touches of blue.  I always thought this piece was overly warm.  Cool accents of Cerulean Blue Hue on the water here and there offset the warmth.  I also harden the edges of some of the foreground rocks to add interest and also to contrast with the distant softness.


Sunday, March 19, 2023

Extreme Makeovers for Plein Air Paintings: From the North Rim

View in browser

Madeover: From the North Rim, 12x9 Oil
Available, PM/DM me if interested
Read about my process below

(Continuing my series of Extreme Makeovers for Plein Air Paintings.)

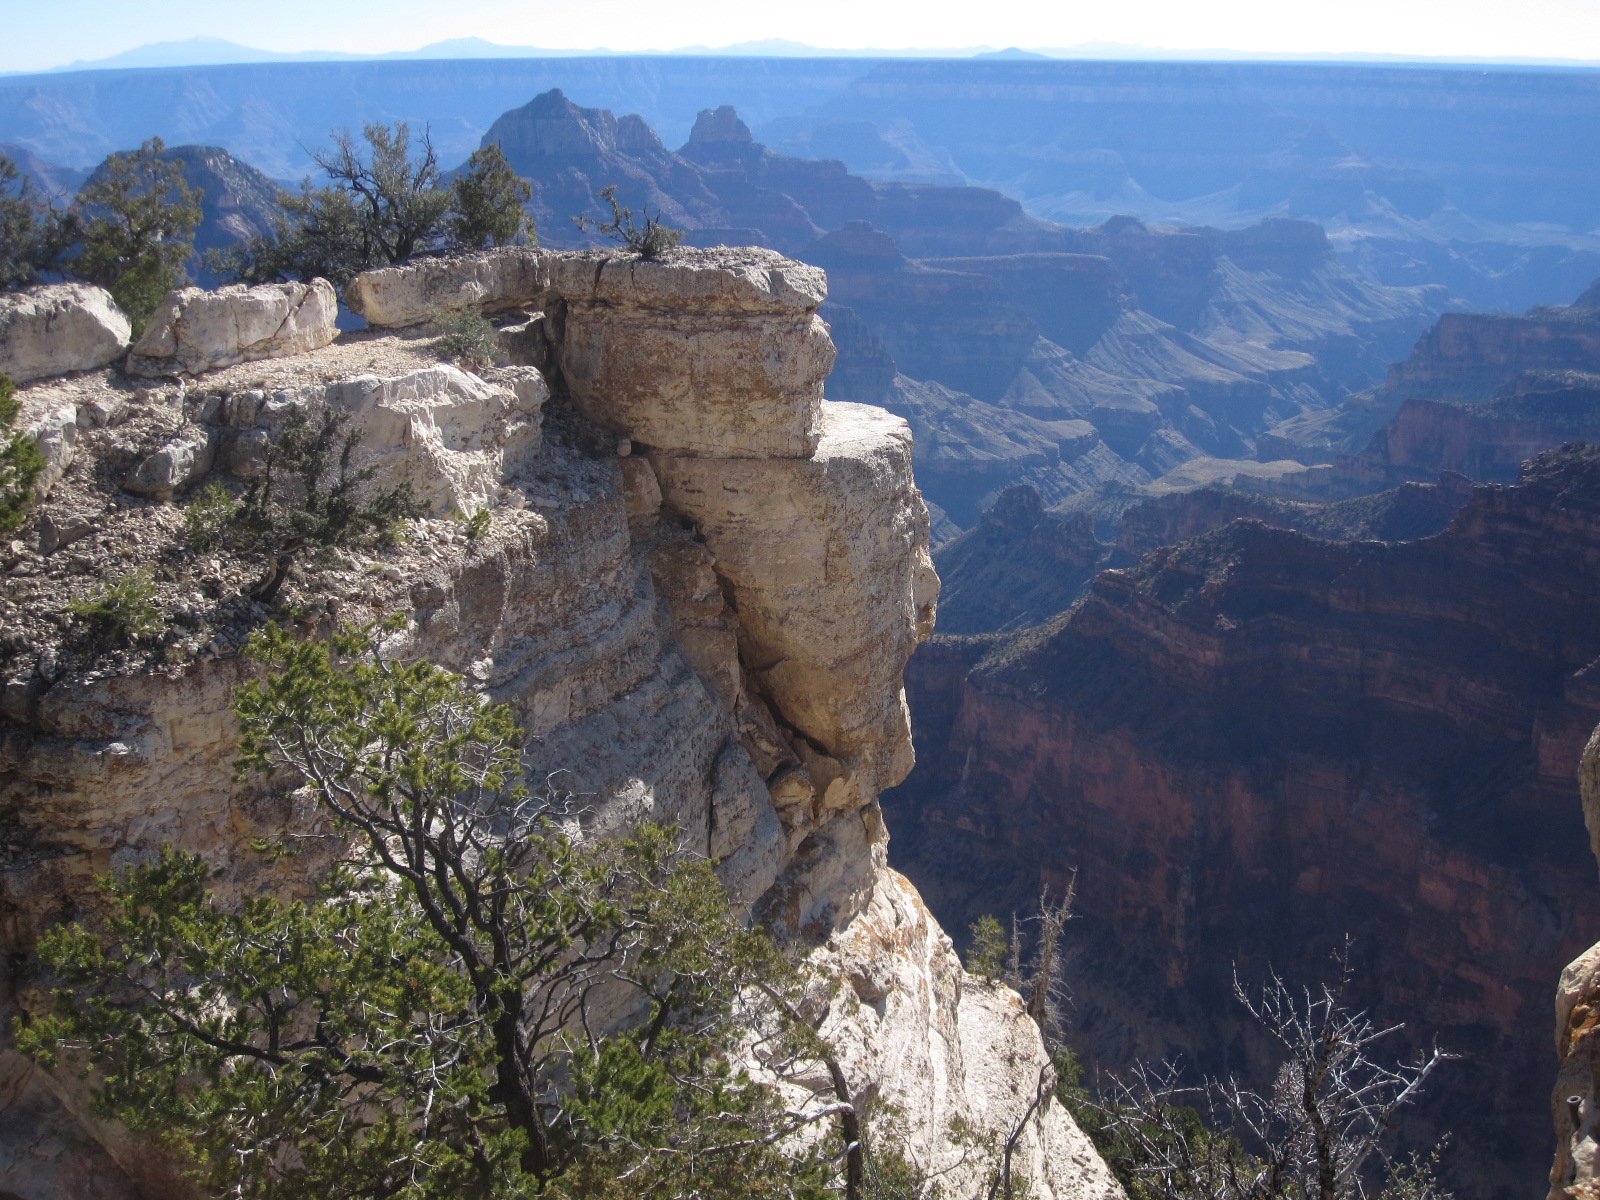
Why's the South Rim of Grand Canyon National Park such a crowd scene?  Well, it's incredibly easy to get to.  Major roads from Flagstaff, I-40 and elsewhere zip you right to it on a beeline.  The North Rim, on the other hand, isn't so easy.  The drive from the South Rim's visitor center to the North Rim is a good four hours.  And because of snow and high terrain, the road from Jacob Lake, the only road that gets you there, is open just from mid-May through November.

Even though I've painted the South Rim many times, I've managed to get to the North Rim just once.  On an early November RV painting trip to Marble Canyon and Vermilion Cliffs in northern Arizona, my friend M.L. Coleman and I decided to head to the North Rim.  Unfortunately, this was right after a full federal budgetary shutdown (thank you, Congress), and the Park had laid off most of its employees because of it.  Because of the lack of staff, the only road open was the one that goes to the Grand Canyon Lodge. This was unfortunate, because other roads lead you to some fantastic views, especially near Point Imperial and Cape Royal.  Because of this—and the fact that the long drive had cut into our time and we still had to find a campsite for the night—we stayed only long enough to do one painting each.  

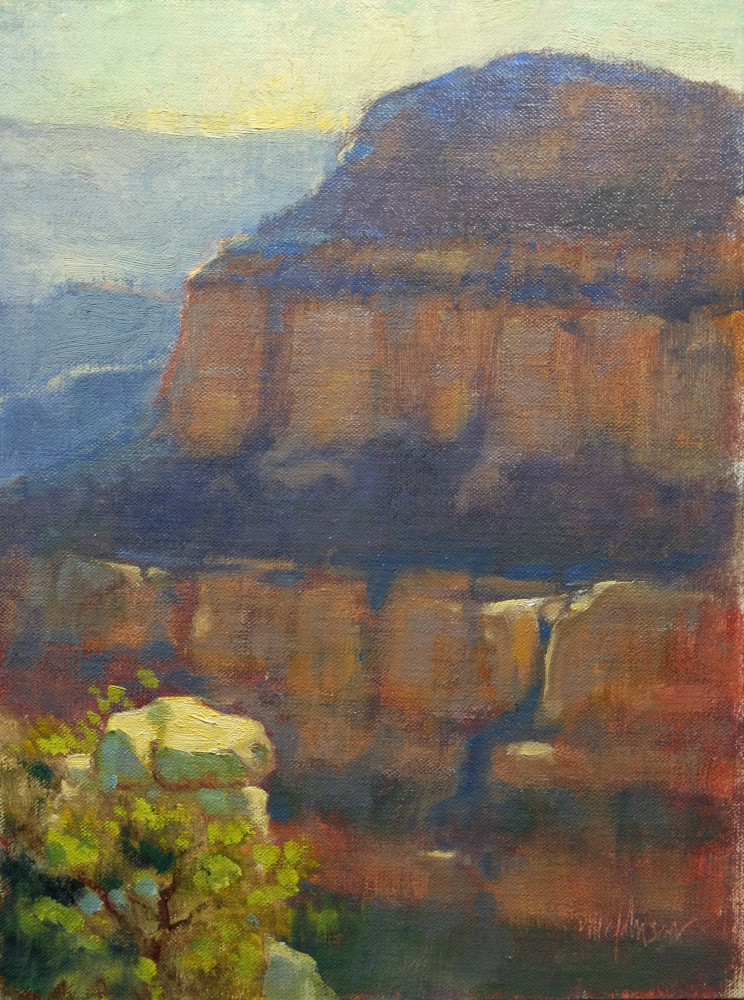
For some reason, my painting skills were off that day, and I was never happy with what I came away with.  As I was going through my boxes of old paintings, this one struck my fancy as one that I could improve easily.

Camping at Marble Canyon, heading to the North Rim

North Rim view

North Rim view

Grand Canyon Lodge

Posed photo, but yes, I'm painting


I'm sorry I didn't take progress shots on this painting, but the changes were simple.  (I've included some travel shots above for interest.)

1. Original painting, 12x9 oil on linen-covered board.  I don't like that this piece is trapped in mid-values.  It has a somewhat warm and hazy appearance—I don't remember, but maybe it was hazy that day from controlled burns—and I want to correct this by extending the value range. The painting also has a single focal point, the foreground cliff, and I want to give the eye another place to wander to.

2.  Makeover.  I lighten the top of the foreground rock, apply richer greens to the vegetation there, and also add some darker notes.  This pulls the rock closer to the viewer and increases the sense of depth in the view.  To enhance this depth more, and to cool off some of the piece's overwhelming warmth, I add richer blues to the distant, vegetation-covered cliff areas.  Finally, to add a secondary point of interest, I add some raking light to the distant cliffs.

Will I go back to the North Rim?  I hope so.

Sunday, March 12, 2023

Extreme Makeovers for Plein Air Paintings: The Cliffs of Zion

View in browser

Madeover: The Cliffs of Zion
12x16 oil / Available, PM/DM if interested
Read about my process below

(Continuing my series of Extreme Makeovers for Plein Air Paintings.)

I've painted at Zion National Park many times, usually in the early morning and just as the sun was coming up.  Well, there is a certain difficulty with this.  If you haven't been to Zion before, you need to know that if you follow the river into the canyon, which I think has some of the best scenery, the passage becomes narrower and narrower and the walls, closer and closer.  When sunlight penetrates into the canyon striking one wall, the light seems to bounce around forever in the shadows, causing all the shadowed walls to glow with a warm light.  Sometimes this bounced light seems to be very bright—and therein lies the problem.  Our eyes see warm colors as being lighter in value than they are.

1.  Here's a 12x16 oil plein air painting I made several years ago at Zion.  You'll note that the values of the shadowed walls are very light—too light.  So, I begin to make adjustments.  And, of course, one thing always leads to another....

2.  The painting needs some highlights for focus.  I add a tiny light shape—it could be a rock—beneath the sunny cliff area.  I also add a tentative highlight on the peak in the upper middle.  I am thinking of strengthening a pattern for the eye to follow through the painting.

3.  To make the peak with the new highlight stand out a bit more, I darken the sky.

4.  Now to the meat of the matter.  I darken the shadows on the cliffs.  I remember there being a distinct blue tone to the shadows, not that overall warmth that I'd painted originally.  I'll worry about adding warmth back in later.

5.  The shadowed middle ground and foreground grasses and shrubs are too warm, so I work in some of that same shadowy blue I used on the cliffs.  I also begin to play more with the patterning, especially in the foreground, where I add some strong darks.  Oh, and I change the shape of the highlight on the peak, giving it more interest.

6.  I decide the dark accents in the foreground change the balance in the painting too much, so I remove them; instead, I suggest rocks on the left.  This better balances the "weight" of the light area on the right, where the shadow cuts diagonally across the cliffs.  I also change the pattern of the fallen lit rocks just below this, as they seem too distracting at this point.

7.  I like the rocks I added to the left, so I work on them a bit more, giving them more interest.

8.  Still thinking of a pathway for the eye, I add dark accents again to the foreground, but this time I keep them subtle.  

9.  Satisfied with the pathway, I now go back to my shadowed cliffs and overlay strokes of warmer color to indicate bounced light.  I don't want to overdo it, so I manage my values carefully—something that's hard to do in the field, in the heat of the moment, with all the light bouncing into one's eyes.  I also restate the geology of the cliffs, as I lost some of the characteristic strata while overpainting earlier.

10.  Finally, I add more texture with a knife to rocks and grasses/shrubs. I also repaint the sky, creating a gradation from warmer blue on the left to cooler blue on the right.  I add hints of these colors into the grass/shrub area.  I think it's done.  Do you?


Sunday, March 5, 2023

Extreme Makeovers for Plein Air Paintings: Clouds and Peaks

View in browser

Madeover:  "Clouds and Peaks"
12x16 Oil / Available
Read About My Process Below

We've all been here:
With bold confidence, I apply the last stroke of paint.  I step back, feeling pretty good about this one.  Yes, indeed, I've made a fine painting.  I pack up my gear, satisfied, and head home.  I sleep well that night.

But after some time, I go to the studio.  As I pull the painting out of its box, my pride takes a hit.  Something about the design isn't quite right.  And the color seems a bit off.   Hesitant, I heft the painting in my hands.  Should I heave it into the recycle crate or try to save it?
Usually, when I bring a painting back from the field, it only takes a moment of consideration and a stroke or two to bring it to completion. (I give myself no more than 30 minutes to work on a painting this way.)  But now and then, a painting calls for more than that.  Because I think there's still hope for it, rather than scraping it down, I put it in a pile with other misfits.

This winter, we've had unusual weather for the Southwest—weeks of cloud and lingering snow.  Since I didn't feel like going out to paint, I took the opportunity to go through some of my old plein air pieces to see if any of them could be redeemed.  I pulled out a stack that had promise and decided to make my best effort.

And that's what this new blog series is about:  Extreme Makeovers for Plein Air Paintings.  I want to walk you through my process for each of them.  Here's the first one.

1.  Original painting.  I painted this in Sedona, Arizona, years ago as part of a plein air festival.  I believe that I was enchanted by not just the mountain view but also the Italian-villa-style bit of architecture in the foreground.  I was never quite satisfied with this painting, and I think it was because the building had as much interest as the distant mountains.


2.  Building wipe-out.  Often, when not pleased with a piece, I'm not quite sure what the problem is.  Not so here.  I was fairly certain that the building is more of an obstacle for the viewer than a pleasing enhancement.  My first action is to immediately paint out the structure.  I also add a few tentative touches of a richer blue into the shadowed mountain vegetation; the scene seems overly warm and a bit muddy, so I'm working toward putting in some purer cool notes.

3.  Foreground.  With the building now gone, I can see that the mountains were indeed what first attracted me.  This is already a big improvement.  However, the foreground now becomes a problem; it doesn't have any topography to support the viewer "walking" out into the distance where the center of interest is located.  I make a stab at introducing a pattern.

4.  Patterning. The pattern helps, but it needs to be enhanced.  Having hiked over this terrain countless times, I have a good sense of what to do here.  (I find that an intimate familiarity with a particular landscape always helps the painting.)

5.  More foreground work.  I continue reinforcing the idea that this pattern is perhaps a road that follows a set of ridges that lead the viewer up.  I plant trees and shrubbery to help the road come and go visually, providing a little mystery.

6.  Into the mountains and sky.  Satisfied that the foreground is now working with purpose, I move to the mountains.  I sharpen edges, punch up highlights, giving the rocky ledges a more "rocky" feeling.  I also think the sky needs a little work.  It's a bit muddy, so I add some of the purer blue that now appears in the shadowed mountain vegetation and reshape the clouds into a more pleasing pattern.  I also add more touches of blue into the mountain areas.

7.  Finished.  I add a few dark notes into the foreground to bring it closer to the viewer, enhancing the sense of depth in the painting. 

This "extreme makeover" went pretty quickly, as I knew right off the start what the biggest problem was.  Once I corrected that, everything else seemed to follow logically, step-by-step.  Not every painting needing a makeover goes this smoothly, as we'll see in upcoming posts.