Authentically Human! Not Written by AI!
All Content Copyright © Michael Chesley Johnson AIS PSA MPAC

Tuesday, October 29, 2019

Grand Canyon Plein Air Painting Workshop Wrap-up

Cliff Shadow 9x12 Oil - Demo, Available

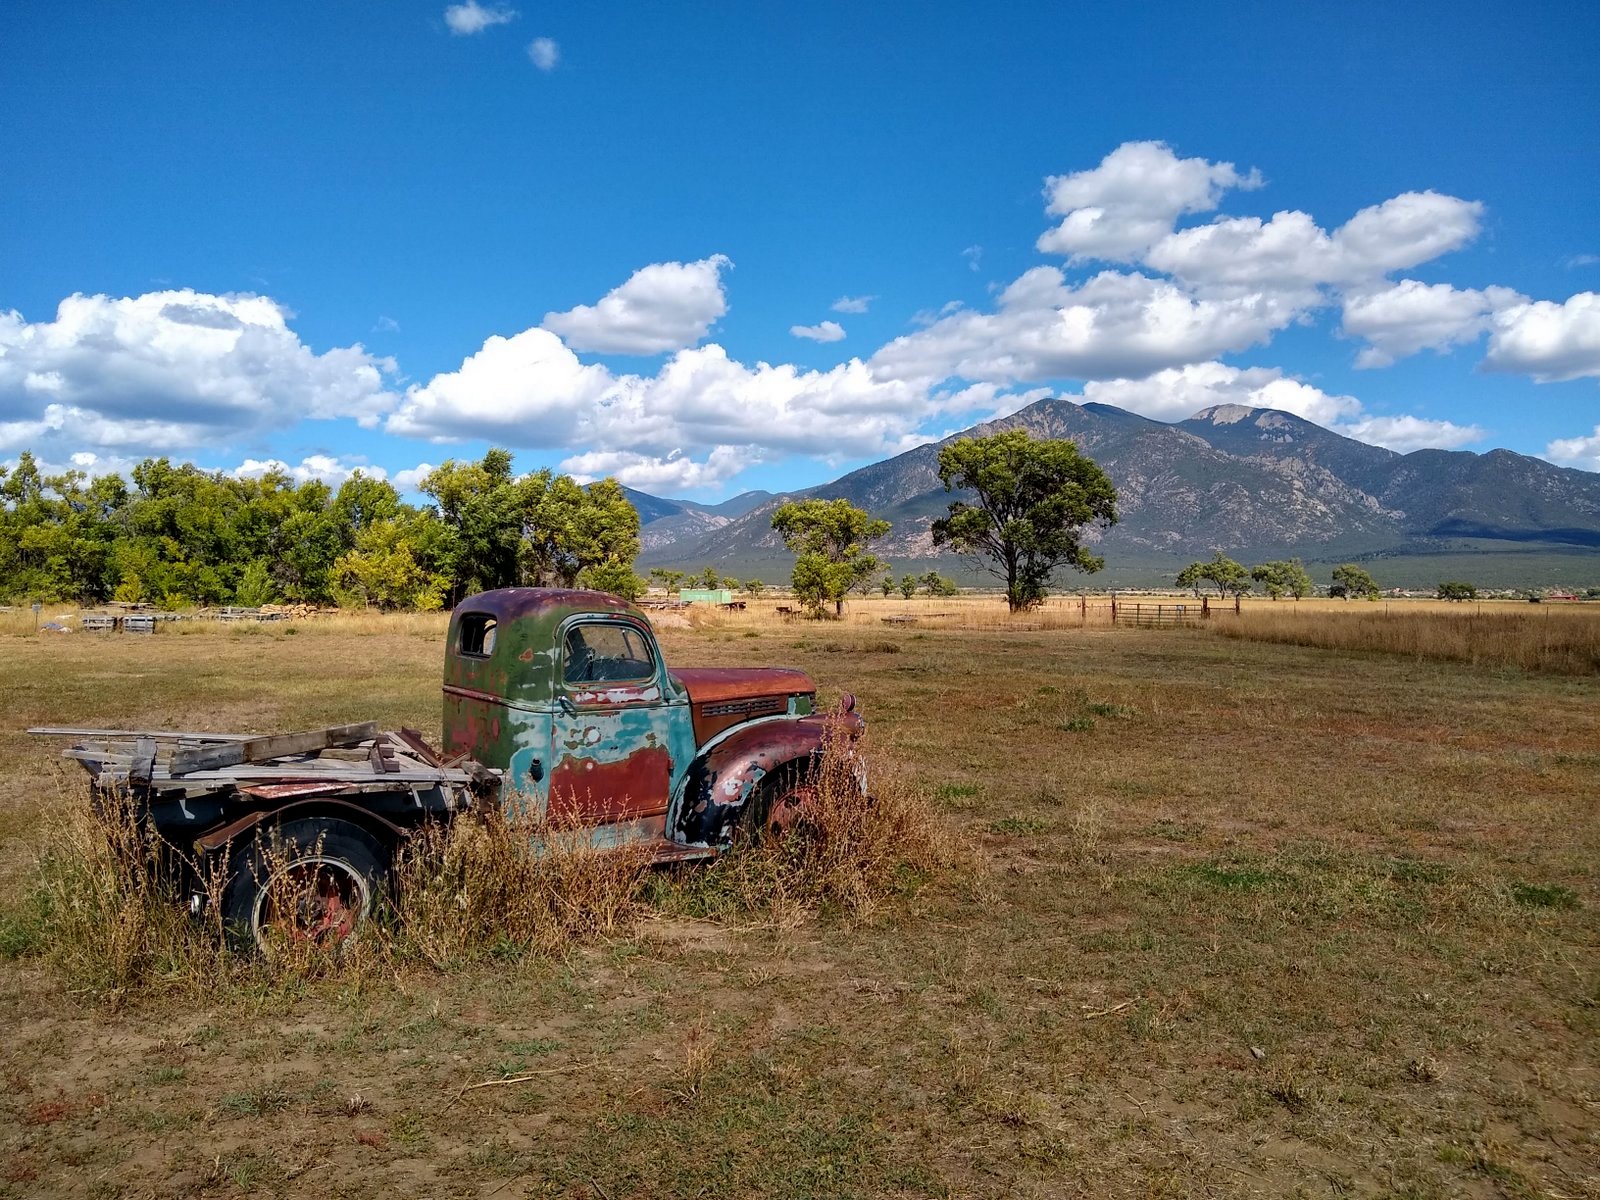
A mile down below me, a copper-green ribbon of water snakes between pink buttes.  Visible but rendered silent by the distance, a ripple of rapids turns the water white.  From where I stand, perched on the limestone rim of Grand Canyon, I can obscure the rapids with my little finger, they are so far away.  Meanwhile, ravens, coal-black, tumble and play in the vast space.  Feeling just the slightest bit of vertigo, I step back.

The Canyon is like that.  It'll show you some thing of beauty, and then the next moment remind you how small—and how fragile—you are in the context of its landscape.

My job this past week has been to help students from Arizona, Florida, Maine and Ohio explore that beauty in paint. This was my second time teaching a plein air painting workshop for the Grand Canyon Conservancy Field Institute. As before, it's been a fantastic experience, partly because the GCC works with the National Park Service to make sure I have the access I need to show participants some truly special parts of the park.  Also, after years of painting there, I'm eager to share my knowledge of the canyon with my students, as well as to help them wrestle all that vastness down into a small canvas successfully.

Good weather gave us clear skies and warmth after a frosty start each day.  A couple of my students camped—camping was free for students—but they stayed warm and cozy in their tents at night, and the sun warmed things up quickly after daybreak.  Some wind, which was predicted for mid-week, never really arrived.  A painting friend of mine says, "Any day without wind at Grand Canyon is a good day."

Thanks to the weather, we had plenty of time to explore the entire length of the park, from Hermit's Rest in the west to Desert View in the east.  This year, I had the honor of playing bus driver and drove the 15-person van.  One afternoon, on the return trip from Hermit's Rest, a herd of elk moseyed across the road—a harem of cows plus a bull elk with a large rack—forcing me to stop, which gave everyone a little time to take some photos.

There's plenty more I could write about the week, but pictures do the job so much better.  Below are a few.  And next week, I'm off to Sedona, Arizona, to teach my next all-level plein air painting workshop.  I have a space or two left, so let me know if you're interested.

Massive 9x12 Oil - Demo, Available

Twisted Tree 9x12 Oil - Demo, Available

Clinging Tree 9x12 Pastel - Demo, Available

A student from Maine, perched near the edge.
A ranger told me he likes to stay "two body-lengths"
away.  There's actually a ledge just beyond him.

A student from Florida who paid attention to my lecture and used a ViewCatcher
to analyze the scene.  It was warm enough for short sleeves!

Raku's first glimpse of Grand Canyon.  Raku and
Trina also camped.

Mule riders heading down for Phantom Ranch.
Some year, it'd be fun to hike down again and paint there.
I'd have the mule riders take my gear.  It's only $70 for
a 30-pound duffel bag.

Sunrise from the Rim Trail on the Hermit's Rest road.

My "Clinging Tree" demo, partway done.  Near
the Desert View Watch Tower.

Sometimes, students clustered together, making my
job of going from student to student easier.

It's always nice to have a picnic table to work on.
This is at Hermit's Rest.

My "Twisted Tree" demo

Me, working on "Cliff Shadows"


Sunny spots prevailed.

"Cliff Shadows" demo in situ, near
the Yavapai Geology Museum


Monday, October 21, 2019

Two Plein Air Paintings - Video Timelapse

When I was in Taos the other week, I took step-by-step photos of some of my plein air paintings.  I thought I'd share the images with you in a short video.  The video features two of the paintings, both of which are oil and painted on gessoed hardboard that had been toned with Gamblin's Transparent Earth Red.  For each of them, I generally blocked in the scene and then focused on the center of interest.  Finally, I took them to the studio and spent about 30 minutes finishing them.

Here is the video.  (Can't see it?  Here is the direct link: https://youtu.be/lY_OmdjI_WE)


And the two completed paintings:

"Rio Grande Quiet" 12x14 Oil

"They Too Passed Here" 11x14 Oil

Thursday, October 17, 2019

Workshop Report: In Taos with Albert Handell

"They Also Passed Here" 12x14 Oil
One of the  paintings I made in Taos.
If you look closely, you might see petroglyphs.

"Look, bighorn sheep!"  I swivelled my head at the student's call and looked up at the rim of black lava rock high above.  Sure enough, one of the big animals peered down upon us, curious about what our group was up to.

I've painted in northern New Mexico many times, and this was only my second time seeing these beautiful creatures, munching grass along the rim of the Rio Grande gorge in Taos.  I was with master painter Albert Handell's mentoring workshop down in the gorge, by the scenic and historic John Dunn bridge, trying to capture the complex personality of a river rock.   This was only one of six days with the workshop, and every day offered us something new and exciting to paint.

Bighorn Sheep on the rim

I've worked with Albert many times over the last 20 years, both taking workshops and also serving as workshop coordinator.  For this one, I was Albert's invited guest—a real gift for me.  I worked hard this week to honor that gift.  And Albert did, too.  He was tough on me, noting in our final critique that he was a little disappointed that I'd not brought a particular painting to a satisfactory finish.  He said, "The painting has 'carrying power' from a distance, but when I get close to it, I don't see any touches of rich color and detail to excite me." Lesson learned.

Students from Alberta, Massachusetts, Arizona, Texas and Missouri joined us for the week.  For the workshop, Albert shared some of his favorite locations from over 30 years of painting there.  In the mornings, he painted, and if we wished to watch the work as a demonstration, he happily shared his thoughts with us.  Some of us watched; others set up beside him and painted the same subject; now and then, one of us went off on her own to paint.  In the afternoons, he went from easel to easel, offering suggestions and the occasional touch of paint or pastel to illustrate a point.  Then, in the evenings, we joined again for critiques and career-building discussions.  It's rare that Albert has a small group—there were just six of us—and we made sure to make the most of it.  In my view, Albert shared much information that was new to me, even though I've worked with him many times.

I thought I'd share a few photos as well as some of my paintings from the week.  By the way, if you are an experienced painter and would like to paint Taos, I'm scheduling a painting retreat (not a workshop) for October 4-9, 2020.  As with my previous retreats, I'll give preference to previous students.  If you haven't taken a workshop with me yet, I have two coming up in Sedona, Arizona (November 5-8, 2019, and April 7-10, 2020) as well as some in Lubec, Maine, next summer.  If you'd like to be on the "interested" list for Taos, please let me know.  For a full workshop schedule, please visit www.MChesleyJohnson.com/workshops.

Here are some of the paintings:

"Along the Mountain Road" 12x14 Oil

"High Desert Barn" 12x16 Oil

"Rio Grande Quiet" 12x14 Oil

"Rio Hondo Pool" 12x16 Oil

"Taos Field" 12x18 Pastel
"Cliff Shadows" 12x16 Oil

 Here are a couple of videos:

Trina shot this while I painted along the Rio Hondo.
(Can't see the video? Link is here: https://youtu.be/SRQGjoZmVjA)

This little visitor kept me company.
(Can't see the video? Link is here: https://youtu.be/aCRBJTCVpq8)

Here are some photos:

I visited the grave of Mabel Dodge Luhan.
Don't know the name?  Look her up.

Aspens were in full color up the mountain.

A cache of petroglphys surprised me at one spot.

One morning, it was cold enough for ice!

Trina and Raku hiked while I painted.

I guess the fishing was good in the river.

Albert making a mark to make a point.

A demonstration in the studio by Albert.

Painting at John Dunn Bridge.

Near John  Dunn Bridge.

On the banks of the Rio Hondo.
It's just a sliver of water with an even narrower sliver
of bank, and my feet got wet.

Taos Mountain and a stage prop.

Demonstrating in the field by Albert.

At John Dunn Bridge.

The famous bridge itself.

After the workshop, I visited the Nicolai Fechin Museum.
This is Fechin's painting of his daughter, Eya, whom I met
years ago just before she died at age 87.

Wednesday, October 16, 2019

Supply Lists—Miscellaneous Items

The ViewCatcher

Finishing up my series of posts on supply lists, I offer here the supply list of miscellaneous materials for my plein air painting workshops.  (You can always find the current supply list here.)

Outdoor easel:  For oil, I like the 9x12 Guerrilla Painter Box or 10x12 Open Box M plus tripod.   If you use a tripod, make sure it has a metal head, not plastic.  I use the ProMaster XC525.  Whatever easel you use, it should be portable and lightweight and above all stable.  An old standby is the trusty French Easel.  If you bought a new easel for the workshop, make sure you know how to set it up.
Commentary:  There are many different field easels and pochade boxes on the market these days.  I've listed two of my favorites, but I have many others that I still love and use.  I've defined the desirable characteristics above.  But please, don't bring to the workshop one that is "new in the box."  Do yourself a favor and learn how to set it up before you get to the workshop that first morning.
As for a tripod, believe, me you can't tighten a plastic head enough.  It will always wobble.  Metal is best. 

Umbrella:  Not necessary, but helpful in intense sunlight.  I like the Best Brella.
Commentary:   Sometimes an umbrella can be more of a hindrance than a help.  You'll want one that is easy to set up and also very quick to take down in case the wind starts to blow.  With the Best Brella, it takes only a second to remove the umbrella section from the mounting clamp.
Would you like to take a workshop with me?  For schedules and details, visit www.MChesleyJohnson.com/workshops/

Stool:  Not necessary, but if you must sit to paint, I strongly suggest a camp stool or collapsible chair, since not all locations have picnic tables.

Paper towels and small garbage bags.

Small sketchbook and 6B drawing pencil for making quick thumbnail sketches.
Commentary:  My backpack holds a 3.5"x5" spiral bound sketchbook, which I use for mostly value sketches.  Sometimes, if I want to make larger, more involved sketches, I'll take one that is 5.5"x8.5"--still small enough for my backpack, but big enough if I want to do detailed drawings.  The soft lead pencil (6B or close to it) is important because it enables me to "sneak up" on the dark values.  I start off my value sketches with mid-values and expand the range as needed.  I find this suits my style more than, say, a set of grey markers, which lock me into a particular set of values too soon.

ViewCatcher and pocket color wheel
Commentary:  The ViewCatcher is essential, as it helps crop the scene and also has an "isolator hole" that lets you compare the color qualities of different parts of the landscape.  The color wheel is more for our critique sessions and studio work; I don't take it to the field.

Hat, sunblock and water bottle

"Baby Wipes" for cleaning fingers

Appropriate clothing and footwear

Photos to work from.   In the event of inclement weather we will work in the studio from photos
Commentary:  These photos should be ones you took with painting in mind.  That is, they will have a definite subject, a few large simple shapes and good value contrast.  Do not bring photos of sunsets, pets or close-ups of flowers.

Lunch.  Bring a bag lunch, because if we're out in the field, we may not have dining facilities or a deli nearby.
Commentary: Granola bars, fresh fruit--anything to keep your energy going is good.

This post concludes my plein air painting workshop supply list and commentary.  With modifications, you might find it useful as a checklist for your own outings.

Sunday, October 13, 2019

Supply Lists—Pastel

Some of my pastels - and I have many more!

Continuing in my series of posts on supply lists, I offer here the supply list I use for pastel painters in my plein air painting workshops.  (You can always find the current supply list here.)

Pastels:  You should have a set of at least 36-48 pastels to start with.  The more you have, the better.  Both Polychromos (36-pc set), NuPastel (48-pc set) and Cretacolor (72-pc set) make good sets.  You may also want to consider the "Michael Chesley Johnson Plein Air Set" of 50 pastels from Pastels Girault, which have properties of both hard and soft pastels.  This may be ordered from the US distributor, Pastel Etc.: Michele Aplin, michele@giraultpastels.com or 310-640-8388 ($245).  Plus a selection of softer pastels such as Blue Earth or Mount Vision.
Commentary: For oil painting, you can do a lot with just six tubes of paint plus white.  But to do the same with pastel, you'll need many more colors.  To replicate the facility of the split-primary oil palette, you need not just cool and warm versions of the three primaries but also the same of the three secondaries, plus four or five steps in value and both hard and soft versions.  Multiply this out (2 temperatures x 6 colors x 5 values x 2 degrees of hardness) and you'll find you need 120 sticks.  I like to supplement this with a few greys and neutrals.
And yes, this can be expensive.  All that said, you can make a decent painting with a 48-stick set of hard pastels, supplemented with a few softer ones for highlights and dark accents.  Another option is the 50-stick set I designed for Pastels Girault, which is a great compromise set.  I use it for travel.  (It's $245 and, no, I do not get a commission.)  You can see the set here.  For free shipping and $15 off, contact Michele Aplin as noted above. 
By the way, please do not bring just a set of eight sticks or a tiny box of odds and ends from back home.  You really need at least a 48-stick set that has cool and warm versions of the primary and secondary colors, plus a good value range.

PaperUArt Sanded Pastel Paper (plan on 2 9x12 sheets per day for full-day workshops, and also a few 5x7 pieces.)  I like the 500-grit.  ArtSpectrum Colourfix will also work for liquid washes, but it is much coarser.  Do not bring Sennelier LaCarte, as it can't stand moisture.
Commentary: I teach two methods with pastel, one in which I use a liquid wash and another in which I don't.  You need a paper that can stand up to water, alcohol and OMS.  For this, I recommend UArt and Colourfix.  (Wallis is ideal—if you can still find any of that discontinued brand.)  The surface on the LaCarte, a paper I do not recommend, is applied with a water-soluble glue and is also rather fragile.  Finally, don't bring just any old sketch paper, as it will buckle when you apply moisture and doesn't have the tooth for pastel.

Backboard to tape paper to
Commentary: Any sturdy board will work, really.  I use foamboard to which I've applied a sheet of white contact paper; the contact paper protects the surface from damage when removing tape.  Gatorfoam is a more expensive but more durable alternative.  A drawing board works just fine, too.

Solvent: either rubbing alcohol or Gamsol.  If you use the rubbing alcohol, try getting it in spray bottle, as I have taken to spraying on the alcohol rather than using a brush
Commentary: Rubbing alcohol or denatured alcohol?  It doesn't matter.  Also, 90% rubbing alcohol dries faster than 70%, which can be a problem in an arid climate.  Gamsol dries much more slowly, but if you're like me and you enjoy playing with brush strokes, it gives you plenty of opportunity to make interesting marks.  When demonstrating, to save time I use alcohol; but when painting for myself, I use Gamsol.  When I use my spray bottle of alcohol, I forgo the brush and instead use my nitrile-gloved hand to push around the liquified pastel.

Old bristle brush (cheap 1" trim brush is fine)
Commentary: This is for brushing on the alcohol or Gamsol in the underpainting stage.

Also:  Container for solvent, masking tape
Commentary: Please don't bring a glass container, as it may break.  Instead, bring a Nalgene bottle or the equivalent that won't be dissolved by the solvent.  As for masking tape, bring the buff-colored type.  Don't bring tape with a strong color (blue, green, orange, etc.) as it will distract.  Some artists like drafting tape because it has less tack and doesn't damage the paper as easily.  I prefer masking tape, because I can get it anywhere.  Since I don't leave it on for any longer than a day, I have no problem with it.

Next time, I will share my supply list of miscellaneous items.

Would you like to take a workshop with me?  For schedules and details, visit www.MChesleyJohnson.com/workshops/

Wednesday, October 9, 2019

Supply Lists—Oil

Some of my oil paints - and I have many more!

In my last post, I wrote about supply lists in general.  Now I want to offer the supply list I use for oil painters in my plein air painting workshops.  Over the years, I've varied it a bit, but I always use a split-primary palette, with variations.  (You can always find the current supply list here.)  Although in my own practice I vary my palette frequently, for workshops I always make sure I'm teaching with what is on the list.

Would you like to take a workshop with me?  For schedules and details, visit www.MChesleyJohnson.com/workshops/

To avoid confusion, I keep the supply list short. But here I thought I would be helpful to comment on my choices.

Paints:  Split-Primary Palette: Cadmium Yellow Light, Cadmium Yellow Deep, Cadmium Red, Permanent Alizarin Crimson, Ultramarine Blue, Sap Green, Titanium-Zinc White.  Earth Colors: Yellow Ochre, Burnt Sienna, Raw Umber. (I use Gamblin for all my oil painting materials.  The Gamblin 1980 Oils are "student grade" but work well, and I recommend them if you don't want to pay for "artist grade.") 
Commentary:  First, let me say that all the paints I use regularly are from Gamblin Artist Colors.  The paints are consistent from batch to batch, and they play well together.  Plus, Gamblin has offered me tremendous support over the years with my workshops, and they even asked me to design a color ("Sedona Red") for the Sedona Plein Air Painting Invitational several years ago.  They've even named me a Gamblin Dedicated Workshop Instructor.  Scott Gellatly, the product manager, has been very helpful whenever I have technical questions, and as a painter himself, he deeply understands concerns painters have about materials.  So, you can understand my bias towards Gamblin.  All that said, there are many brands of paint out there, and each painter has his own reasons for favoring one brand over another. 
My palette is a modified split-primary palette.  The standard split-primary palette has a warm and a cool version of the three primaries.  My variations come into play with the blue.  I have just one blue on this list—ultramarine blue—and I have added sap green.  Yes, you can make your own green, but sap green is very convenient color to have, although you always will want to modify it with another color.  One interesting thing to note:  add a bit of sap green to ultramarine blue plus white, and you get a warm, greenish-blue that is perfect for a clear sky close to the horizon.  (Some of you may remember I used to have phthalo green on this list; beginners have such a hard time controlling this color that I've removed it.) 
I have the earth colors on the list because they are good modifiers for the more intense pigments on the split-primary palette.  Raw umber, for example, greys down ultramarine blue nicely to a more realistic sky color.  Yes, you can make the earth colors (more or less) from the split-primary palette alone, but like sap green, they are convenient to have.  (Speed is of the essence in plein air painting, and the less fussing you have to do with mixtures, the better!)

Thinner:  Gamsol.  Please, no turpentine.
Commentary:  I use Gamsol (Gamblin's odorless mineral spirits) for washing my brushes and also for thinning paint.  Again, there are other OMS products, but make sure you get genuine OMS and not some "natural" substitute.  Some students bring Turpenoid, which is fine because it is OMS, but don't bring Turpenoid Natural.  This is a citrus-based solvent that is good for washing bushes, but you can't use it as a thinner—it never completely dries. 
Turpentine is just plain evil.  It has a very strong odor, and in the studio, it will give everyone headaches.  Even if you use it only outdoors, when you bring your paintings into the studio for critique, the odor will be overpowering.  Don't bring it to the workshop.

Medium:  Galkyd Gel (dries faster) or Solvent-Free Gel (dries more slowly) - but I don't use it very often, so it is optional
Commentary: If I use a medium at all, it might be for either of two reasons.  First, if my paint mixture isn't workable enough, I'll add some Solvent-Free Gel.  Second, if I'm worried about my paint not drying fast enough, I'll add a little Galkyd Gel.  Both of these are from Gamblin.  You can certainly bring some other medium, such as Liquin.  I do like the gels because they don't require me to use a metal cup to contain them.  (After only a couple of uses, the lids on those metal cups seem to get welded on.)

Panels:  Hardboard panels to which two coats of acrylic gesso have been applied.  (Bring 9x12s - plan on 2 panels a day for full-day workshops - and also a few 5x7s).  Avoid the cheap cotton canvas-covered cardboard panels.  If you prefer not to make your own panels, Ampersand Gessobord is fine, although it is more "slippery".
Commentary:  For my method of painting, where I am working wet-into-wet and with a lot of layering, it's important for the intial block-in to not mix very much with the layers I put on top of it.  I like the panel to absorb some of the thinner and oil from the block-in so it is somewhat "fixed."  This approach doesn't work with a non-absorbent panel.  The cheap panels seem to be coated with Teflon, which is why I avoid them.  Ampersand Gessobord is better, but you still have to develop a knack for working wet-into-wet.  A more absorbent panel, such as what I make myself, works better.  (I use hardboard panels from Dick Blick, apply a coat of Gamblin PVA to size it, then two coats of acrylic gesso; if this is too absorbent, I will brush on a layer of Golden Acrylic Matte Medium.  Each of these layers has to dry before the next layer, of course.)

Brushes:  Hog Bristle Flats (#10, #8, #4) plus a couple of small hog bristle rounds (#4, #6). 
Commentary:  I use good brushes—Silver Brush's Grand Prix line—but whatever you bring, make sure they don't splay and have "wild hairs."  Some of the synthetics are good and don't wear down as quickly.  I've started using Silver Brush Bristlons for my block-in, where I am rather vigorous with the scrubbing.

Painting Knife: I like a small, trowel-shaped one about an inch long
Commentary:  This small knife is great for scraping (both palette and failed paintings), for mixing paint and also to paint with.  I use an RGM "Idea Line" knife 19/5 IR.  This is made of a single piece of metal with no weld to break.

Also:  Wet panel carrier, container for thinner.  Handy Porters or PanelPak for carriers; I use the smallest Holbein brush washer for my thinner container.   If you are traveling, you will need these carriers to get your paintings home!
Commentary:  I can't tell you how many times students forget they need to get their wet paintings home.  If you're flying and have to pack light, consider also using Galkyd Gel in your paints, as this will help the painting dry in a day or two.  As for the brush washer, don't use a glass jar—it will most likely break in the field when you drop it on a rock.  I've used my stainless steel Holbein brush washer for over 15 years and have had to replace the gasket only once.  Although it's expensive, it's worth it.

Next time, I'll share my supply list for pastel.

Sunday, October 6, 2019

About Supply Lists


Some of the paint supplies in my studio.

"I just brought what I had, and I hope that's OK."  I hear this now and then from my workshop students with regards to materials.

Well, it's not OK.  Painting instructors give students a supply list for a good reason.  Usually, what is being taught is a particular technique or method for which specific materials are required.  For example, as a teacher of landscape painting, I use a split-primary palette (with variations) that enables me to record color temperature contrasts between light and shadow.  This is possible with a split-primary palette, which consists of a warm and a cool version of the three primaries.  If you just bring a red, yellow and blue, the task is harder, especially for beginners.

Even if you're an experienced or advanced painter, you'll want to learn something from the workshop.  If you've been playing with the Zorn palette (yellow ochre, vermilion and ivory black) and feel you haven't exhausted its possibilities, I recommend you put that aside and try my way for the duration of the workshop.  You can always go back to it afterward.
Would you like to take a workshop with me?  For schedules and details, visit www.MChesleyJohnson.com/workshops/
If you don't have exactly what I list but are close—and I always suggest you consult with me first on your options—you'll still be able to practice and learn.  Taking again the split-primary palette as an example, if you have Hansa yellow light instead of cadmium yellow light, you'll be fine.  Or if you'd rather use, say, paint from Gamblin's 1980 Oil Color series, which is cheaper than their Artist Grade line, that's fine, too.  But if you have any doubt, please ask.

On the other hand, if it's not a workshop but a painting retreat, then what I offer is a list of suggested supplies.  The retreat is about getting some quality painting time with your favorite medium in a special place—or about playing with a new medium or technique if you wish.  (It's also about learning from each other and renewing old friendships and making new ones, but that's another blog post.)  If you'd like to try any items that are new to you on the suggested list, I'll be happy to work with you on that at the retreat.

In my next couple of posts, I'll offer supply lists for oil and pastel and go into a detailed explanation of why I suggest what I do.

Friday, October 4, 2019

The 2020 Calendar is Here!

The 2020 calendar is here!

Every year, I go through last year's paintings and pick out my thirteen favorite to put into a calendar.  This year, I'm a little early on this project--so you have plenty of time to order them for yourself and other loved ones for the holidays.  (WalMart already has Christmas decorations out!)

The calendar also notes the major US, UK and Canadian holidays and offers plenty of space for scribbling down appointments.  You can get it for $11.99 here, at Lulu:

Support independent publishing: Buy this calendar on Lulu.

Calendar Specifications:
• 11” wide x 8.5” high (closed), 11” wide x 17” high (open)
• 100# unlaminated white cover stock
• 100# white gloss interior text stock
• White wire-o binding covers .375” at the top of the cover image and bottom of interior images
• Hole punched in photo .25” from top edge