Authentically Human! Not Written by AI!
All Content Copyright © Michael Chesley Johnson AIS PSA MPAC

Monday, January 30, 2012

Pricing Paintings


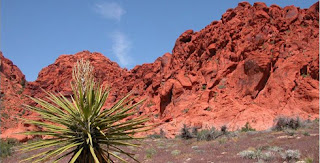
"Red Rock Quiet" 9x12, oil - Zion National Park

Students ask me how to price their paintings.  When I first started out, I didn't have any idea, either.    What was a reasonable price for a 9x12 pastel - a hundred bucks?  A thousand?  Judging from some of the prices I'd seen in galleries, it seemed like the range was pretty wide, and price didn't necessarily relate to the quality of the work or the artist's reputation.

My mentor, Ann Templeton, introduced me to her gallery in Ruidoso, New Mexico.  The owner liked my work, and I liked the gallery.  So, I asked her what she thought she could get for my 9x12 pastels.  She named a price - $300 - and so that's where I started.   Since that time, I've raised my prices annually if things were selling, and kept them the same if they weren't.  (I have yet to drop the price.)  It's been a good policy, and I think my work today commands what I consider a fair price.

Whenever I go to a new area looking for a gallery, my procedure is to ask what they think they could get for my work.  Sometimes it's higher than what similar work is priced somewhere else.  And that's okay.   I know the received wisdom is that prices should be the same across all galleries, but I disagree.  The price is whatever the market will bear.  Some galleries have access to a wealthy clientele; some don't.

As for different sizes, I price by the square inch, but as the number of square inches increases, the price per square inch drops.  Bigger paintings cost less per square inch than smaller ones.  I built a little spreadsheet that does all the calculations for me.  One important thing to take into account is to make sure you consider framing and the gallery's commission.   If you charge $500 for a painting, your gallery will take $250 (if you have a 50/50 deal), and if the framing cost $100, that will leave you with only $150.  If you're shipping work to an exhibition, make sure you take shipping into account, too, as it can eat up your profits.

Sometimes I'll offer sketches and demonstration pieces for sale.  These I price lower, since they are often unframed and, well, sketches and not finished work.  I price them reasonably, keeping in mind that often these go to students or to people who'd like a piece of original art but just can't afford a finished piece.

There are many ways to price artwork, and this is just what works for me.  Check with other artists to see how they price things and what their philosophies are.  The bottom line is, if you're trying to make a living at this, you want to get paid a reasonable rate for your work - and to make sure it gets out the door at whatever price.  (Click here to see more of my plein air landscapes.)

How do you price your work?

Saturday, January 28, 2012

The Problem with Oils


My studio palette, wrapped up and waiting.

In my previous blog post, I wrote about a problem I have with pastels.  To be even-handed, today I'm writing about a problem I have with oils.

I love oils.  I love the way I can push color around on my canvas with a brush.  There's something relaxing - and yet curiously energizing - about watching color flow and change.

However, oil paint is expensive.  Good paint, anyway.   And if you're painting properly, you'll always have a certain amount of waste.   One of the worst things a plein air painter can be is stingy with paint.  Putting out a pinhead's worth and then trying to cover, say, a 9x12 will cause you to stop and remix too often.   When you're running a marathon, you can't stop for a granola bar every mile.  You'll lose focus, motivation - and probably the race.  (Not that painting should be a race!)

I always end up with perhaps a half-tube or more of paint on my palette.  Some of it is still clean, some of it isn't.   The dirty paint I scrape up into a pile and slide out of the way to the far right of my palette.  This paint makes a nice grey for toning canvas or dulling color mixtures.  If I'm painting the very next day, I'll just cover the palette with plastic wrap and tuck the wrap down around each pile of paint.  This keeps oxygen away from the paint, which "cures" by oxidation.  If I'm not painting for a couple of days, I'll also stick my palette in the freezer.  Oxidation is slowed down by cold temperatures.  This way, my paint stays reasonably fresh until the next time I go painting.

However, sometimes I go much longer without painting in oil.  (I paint half the time in pastel.)  Or, if I'm travelling, I may not have a freezer or even plastic wrap available, and usually my palette is being kept in a hot car.  When this happens, I have to throw paint away.  That breaks my heart.   The most expensive paint I use regularly is nearly $30 for a 37ml tube.  And I have used $60 tubes.

Some of you might say, Raise the prices of your paintings.   But I won't - and that'll be the subject of a future post.

Thursday, January 26, 2012

The Problem with Pastels


Faber-Castell Polychromos


Mount Vision

I love painting in pastel. Pick up a pastel stick, and you've got immediate color. Paint with it, and it calls up all the pleasure you had as a kid finger-painting. Pastel is also how I got back into painting, so it has a very special place in my heart.

But here's my problem with pastel. It's not easy to restock your pastel box.

I keep my pastels sorted in two ways in my Heilman Pastel Box. First, by hue: Green, blue, violet, red, orange and yellow. (I also have a couple of spots where I stash a few browns and greys.) Second, by value, with dark at the top and light the bottom. If I've recently restocked the box, painting is a real pleasure.

But over time, such as when I'm travelling cross-country teaching workshops, sticks I use frequently get worn down to nubs. Sometimes I even run out of a color. By the time I'm ready to restock, I have to pull out each nub with tweezers and try to match it against my color chart. (See my color charts, above.) For the colors I exhausted while en route, I have to take a long, hard look at my box to see what's missing. Sometimes I don't see what's missing until I need that particular color again.

Restocking the box is, in my mind, a project on the level of doing my annual taxes. And, I have to admit, I restock the box about as frequently as I do my taxes.

I know there are many systems out there for restocking your pastel box. As any of you who've taken my workshops know, I'm a pretty organized guy. I have a good system, so long as I keep on top of it. That's the way with any system - you have to keep on top of it.

My system for restocking my oil painting box is far easier. I have eight tubes of paint. If one tube looks low, I grab a backup. I always keep at least one backup of each color in stock. Keeping track of eight oil colors is a snap compared to keeping track of several hundred pastel sticks.

All that said, I love pastel. If you want to grab color and go, there's nothing like it.

Next time: The Problem with Oils.

Wednesday, January 25, 2012

Painting Scraps and Composition

Back when I first started painting in pastel, everything I painted was a custom size.  I cut my paper to fit the scene.  Instead of  9x12s, 12x16s and so on, I ended up with sizes like 13x17.  This meant that every framing job was a custom job - and thus somewhat expensive.  On a beginning artist's budget, it didn't take me long to figure out that painting to standard sizes would save me money, because I could buy readymade frames and precut mats.

I did this for years.  But standard formats began to cramp my style.  Sometimes, a landscape would demand something other than a 9x12 (or a 3:4 format), such as a double-square (1:2) or even a triple-square (1:3).  As I began to explore design, I found that I was hurting myself by sticking with the standard formats.  Yet, I felt that I needed to stay standard, since any sketch might turn into a masterpiece that I'd have to frame.

But when cutting paper for standard sizes, I always seemed to end up with odd-sized scraps.  I began to use these for quick little sketches outdoors.  I began to really enjoy doing "scrap" paintings.  The practice was liberating, because I knew I wasn't going to frame them.

Somewhere along the line, I stopped thinking about the framing altogether.  I started thinking just about the painting.  If, I thought, an odd-sized piece were to end up being good enough to frame, then I'd deal with it when the time came.  I'd come full-circle regarding sizes.

These days, when I take my 9x12 sheet into the field, I'm likely to take a piece of tape and mask off a smaller area that fits my scene better.  This always leaves me a scrap for later.   Here are two sketches I did this week on a single 9x12 sheet.   Neither design would work well in a 9x12 format.

By the way, we had a day of overcast and snow squalls.  These were painted on that day.

Painting Scrap 2  (2.5x11.5)

Painting Scrap 1  (6x11.5)

Sunday, January 22, 2012

Tubac, Arizona, Workshop Report

I spent the last week in historic Tubac, Arizona, teaching an oil-only advanced plein air painting workshop.  We had fantastic weather - crisp mornings, warm afternoons - and equally fantastic scenery.  One of the things I like most about Tubac, besides the consistent January weather, is the architecture.  Thanks to a few hundred years of history, starting with the Spanish in 1752, the town has many fascinating structures.  Although I hadn't intended for the workshop to focus on buildings, we painted adobe houses in Old Tubac, parts of the Spanish Presidio and the monumental structures at the Tumacacori Mission.  It wasn't until the last day that we relaxed a bit and painted views of the less-challenging Santa Rita mountains.

I'll be offering a Tubac workshop again next year, January 15-18, 2013, through Katherine Reyes Workshops.  Put it on your schedule now, and stay tuned for details.  In the meantime, here are a few paintings and photos from this week.

Demo - Tumacacori Mission, 5x7 oil

Demo - The Tortilla Lady, 9x12, oil

Demo - Adobe Home, 9x12, oil

Demo - Otero Hall at the Presidio, 5x7, oil

Demo - Santa Rita Mountains, 9x12, oil (knife)

Demo - Tubac, the Ninth Hole, 9x12, oil

Tumacacori Mission - Detail

Tumacacori Mission - Detail

Tumacacori Mission

Tumacacori Mission 

Tumacacori Mission

Dos Silos Ranch

Tuesday, January 17, 2012

Plein Air Convention and Expo in Las Vegas

As I mentioned in an earlier post, I'm one of about 30 artists who have been invited to demonstrate and teach at the very first Plein Air Convention & Expo in Las Vegas, Nevada, April 12-15.  The artists include such luminaries of the plein air universe as Scott Christensen, Clyde Aspevig, Matt Smith, Jeremy Lipking and Ken Auster.  I'm honored to have been invited and excited to be in their company.  If you're coming out, you should be excited, too.  The event is an all-you-can-eat plein air buffet!


There'll be plenty of events to attend, but I'm looking forward to the painting sessions at the Red Rock Canyon National Conservation Area. To minimize traffic in the conservation area, the Expo's organizers (Plein Air Magazine) have thoughtfully arranged for buses to take participants in.  Once there, you'll get to pick and choose whom to watch, and you can watch as many of us as you wish. But in addition to painting, there'll be formal demonstrations and lectures plus keynote events with John Singer Sargent expert Richard Ormond and California Impressionist historian Jean Stern, among others.

Although I haven't been to the Red Rock Canyon National Conservation Area, it sounds like it'll be a really great area to paint in.  Here's a little about the area from the BLM (Bureau of Land Management) website:

Red Rock Canyon was designated as Nevada's first National Conservation Area.  Red Rock Canyon is located 17 miles west of the Las Vegas Strip on Charleston Boulevard/State Route 159.  The area is 195,819 acres and is visited by more than one million people each year.  In marked contrast to a town geared to entertainment and gaming, Red Rock Canyon offers enticements of a different nature including a 13-mile scenic drive, more than 30 miles of hiking trails, rock climbing, horseback riding, mountain biking, road biking, picnic areas, nature observing and visitor center with exhibit rooms and a book store.
The unique geologic features, plants and animals of Red Rock Canyon NCA represent some of the best examples of the Mojave Desert. One million visitors each year enjoy the spectacular desert landscape, climbing and hiking opportunities, and interpretive programs sponsored by the BLM.

The conference will be based at the Red Rock Casino, Resort & Spa just outside of Las Vegas, and they have a special rate for participants.

It'll be a great time.  I hope to see you there.

Friday, January 13, 2012

Seeking New Painting Workshop Venues


I'm  looking for new landscape painting workshop venues for 2013 and 2014.

Would you or your group be interested in inviting me to teach in your town?  I have a new program, "From Sketch to Studio," in which students will spend time out in the field gathering reference material with cameras and sketchbooks and then go to the studio to create finished works.  I'll show my process and cover the finer points of creating finished studio paintings from the reference material.

I'll  work in oil or pastel, but students may work in any medium.  Length of the workshop may be anywhere from two to five days.  The program can also be customized, such as an all-plein-air workshop or one that is based totally in the studio.

If your group hosts art exhibitions, such as an annual members' show, I'm also available to judge or serve as a juror in conjunction with a workshop.

For more information and pricing, please contact me at mcj.painter@gmail.com.

If you're part of a group, feel free to send this entire post on to your program director.

About Michael Chesley Johnson

An award-winning landscape painter, Michael has taught for art centers and art groups across the country for over ten years.  A Contributing Editor for The Artist's Magazine and a frequent writer for The Pastel Journal, he has authored several books and videos, including Backpacker Painting: Outdoors with Oil & Pastel.  Artist's Network TV offers two of his full-length demonstration videos.   In 2009, he gave two well-received demonstrations to the biennial International Association of Pastel Societies convention in Albuquerque.

For more about Michael:

www.MichaelChesleyJohnson.com
http://www.michaelchesleyjohnson.com/html/schedule.htm  (Michael's current schedule)
www.PaintSedona.com (winter/spring mentoring plein air workshops in Arizona)
www.PaintCampobello.com (summer/fall plein air workshops in the Canadian Maritimes)
http://mchesleyjohnson.blogspot.com (A Plein Air Painter's Blog with helpful tips for the student)

Thursday, January 12, 2012

New THROUGH A PAINTER'S BRUSH Book Coming


A few years ago, I said I try to write a book a year.  Since that time, the annual book has become other projects that include, among other things, videos.  This year, I'm returning to the book idea with Through a Painter's Brush: The Southwest.

The book will be similar in concept to Through a Painter's  Brush: A Year on Campobello Island, which I published back in 2007.  It'll be a hefty collection of paintings, both oil and pastel, plus  photographs and essays about both the area and my painting process.  I'll also include two plein air painting demonstrations, one in oil and the other in pastel.  It'll be a beautiful book.

I've had my sights on writing this book ever since I finished the Campobello one, but I wanted to wait until I'd built up a significant body of work.  After having lived in New Mexico for five years and several winters now in Arizona, plus much travel through the other Four Corner states, I'm ready.  The problem is - I have too much!

So, this book will be larger than the earlier book.  Campobello has 140 pages and 150 illustrations, 75 of which are paintings, but I can't say exactly yet how many more the new book will have.  I will say I've pulled over 300 paintings for possible inclusion.   I'll make the book available in both print and digital editions.  Tip:  the digital version will weigh a lot less, and cost a lot less, too.

I love to play around with design, so I've included a draft cover in this post.  (You can tell I really like that recent Grand Canyon painting!)  I know, it's a bit like putting the cart before the horse, but I had fun doing it.  The book should be out this summer.

By the way, if you're interested in the earlier book on Campobello Island, it's still available in three versions:

Paperback - $35
PDF format - $20
ePub format - $20

Tuesday, January 10, 2012

Painting Grand Majesty with a Tiny Knife


"Precipice at the Grand Canyon" 16x20, oil - SOLD


I spent the last week working on another studio piece for the Grand Canyon Celebration of Art this next September.   This one is a 16x20 and took many days.  Why so long?  Well, I painted with a teensy-weensy painting knife.

If you haven't painted with a knife before, you're in for a treat.  Because a single wipe of the towel cleans your knife perfectly, you won't be going into your palette with a dirty tool, and your color mixtures will be richer and cleaner.  And, the fact that you can clean the tool with a single wipe is a real pleasure.  You use very little mineral spirits or, sometimes, none.

My Two Knives

The size of the tool is inversely proportional to the time it takes to paint with it.  The smaller the knife, the more minutes and hours.  Although I have several knives, I chose to work with smaller ones.  I wanted a bit more detail and to take a little more care with edges and the shapes of things.  In some ways, my smallest knife was like digging the Grand Canyon with a teaspoon.  It can be tedious, but it can also be like meditation, especially with the right radio station.

I started off the painting by toning the panel with a mixture of Prussian Blue, Yellow Ochre and alkyd Transparent Red Earth (Gamblin FastMatte.)  This gave the panel a rich, olive tone that dried quickly.  Next,  using a #4 hog bristle flat, I sketched in my design with Burnt Sienna.  Then I did a quick block-in with a #12 bristle flat to establish a foundation of color.  I've learned that painting with a knife goes faster if the color you're spreading on is somewhat like the color that's beneath it.  That is, don't try painting with a knife on a white background, and don't try it with red on a green background.  If the background color is too different, you'll obsessively try to paint over every speck of background color.  (Unless you're less obsessive-compulsive or paint more impressionistically than I , and can let those little spots go.)

Next, I went from background to foreground, working with the larger of my two small knives.  With this knife, the sky went rapidly and so did the more distant parts of the canyon.  But once I moved to the cliff in the middle ground and the foreground precipice, I switched to my smaller knife.   Finally, I moved back into the distance and added implied detail to the distant canyon areas with this same knife.  Here are some detail shots of the painting for you to enjoy.


Monday, January 9, 2012

Tubac, Arizona, Plein Air Oil Painting Workshop

"Tumacacori Jacal" 9x12, oil - private collection

For those of you looking for a warm-weather-getaway, I still have spaces left in my Tubac, Arizona, oil plein air painting workshop.  Tubac, located in the Sonoran Desert, is one of the earliest settlements in Arizona and is home to the Tumacacori Mission, which was established in 1691 and is now a National Historic Park, and the Presidio, a fort founded in 1752 and now a State Park. Besides painting at these historic places, we'll paint Tubac's colorful streets and its mountain views.

The workshop is oil-only and for intermediate-advanced painters.  It runs Tuesday-Friday, January 24-27.  That's next week!  Price is $395.

We'll be based at the Floating Stone Inn & Aqua Spa, which is also offering lodging to students at a 10% discount.  The Inn occupies the historic Poston Estate and sits in Old Town Tubac, with  many interesting shops and restaurants.

If you're interested in joining us, contact Kathy Reyes, organizer, right away at 520-820-2416.

Here are some images to whet your appetite.  The painting at the top, by the way, is a demonstration I did during last year's workshop.

Painting in Tubac

St Anne's Catholic Church

Painting at Tubac Golf Resort & Spa

Historic Tumacacori Bar (great pool table!)

Tumacacori Mission

Painting at the Mission

Saturday, January 7, 2012

Stretched Canvas or Hardboard Panel?


Outdoor painters work on many different surfaces. I know one painter who even works on copper! But for me, it's usually a choice between canvas or hardboard panel.

I prefer hardboard panels. The reason is that, unlike canvas, they're puncture-proof. (The area around Sedona is thick with thorny vegetation like catclaw acacia, mesquite and prickly pear cactus.) I can also get more of them into a wet painting carrier. If I want a store-bought panel, I use Ampersand Gessobord or Claybord. If I want some interesting texture, I'll make my own on untempered hardboard sealed with Gamblin PVA size followed by a coat or two of Golden Acrylic Gesso randomly applied. I don't use linen or canvas on boards because I don't like to paint on a woven surface placed against a rigid substrate.

Unfortunately, above a certain size, hardboard panels become heavy to lug around. My solution for this is to use stretched canvas, which will be lighter than any hardboard panel over 16x20.

But canvas has its own problems. First, it's not puncture-proof. Second, the canvas transmits light. Anyone who's painted on canvas in a brightly-lit desert will have seen the effect of light passing through the canvas and illuminating the painting from behind. It's nearly impossible to judge value and color that way.

My solution for this is to insert a sheet of foamboard, cut to fit tightly within the stretcher bars, and to secure it with framer's points. If you use something like a gun (Fletcher's FrameMaster) to shoot in the points, you must be careful to not shoot the points through the canvas! I prevent this by gently pushing up on the canvas from below, which raises the board up slightly, letting the gun shoot the points a little higher up on the stretcher bar.  See the photo above for how this would look when done.

By the way, in case you missed the announcement the first time, I have a free 7-minute pastel painting video demonstration on my YouTube channel.

Thursday, January 5, 2012

Why I Don't Do Giclees, Part 2


"Grand Canyon Gold" - detail

I hadn't expected to stir up such a hornet's nest with my last post on giclées.  The torrent of comments was unprecedented in my years of blogging.  The comments ranged from "Thanks, I'm glad someone finally said that" to "I don't agree with you at all."  And the thing is, so many people on both sides made so many excellent points.

The arguments can be sorted, more or less, into two piles.  In the first, artists feel that their unique, handcrafted items will be devalued by reproductions sold to a public uneducated on the differences among the types of reproduction and original art.  In the second, artists feel that selling reproductions to a public that appreciates a pleasing image is a good way to make a living, as  it supplements (and perhaps encourages) the sale of originals.

Yes, there were lots of sub-arguments and hard-to-classify statements.  But what it all comes down to is this.  What are your goals as an artist?   In many ways, making reproductions becomes a personal choice.  It's not a case of one size fits all.  The answer that's right for me may not be the right answer for you.

For me, I relish the hand-crafted.  I like to see the brush strokes and the process beneath the painting.  In some ways, not only is a painting a thing of beauty, it's also a recording of the artist's performance.  By looking carefully, I can see the painter's mistakes, corrections and discoveries.  I get a lot of enjoyment out of that.   The value has to do more with emotion than dollars.

Granted, this sensibility is shared more by other artists and discerning collectors than by the public-at-large, who usually just want something pretty to hang on the wall.

But I relish the image, too.  Whether dramatic or subtle, knife-edged or soft, bleeding with color or grey with summer-day haze, the image must be something I love.   I will buy a reproduction of an image I like if I can't afford the original.  If the color and design are appealing enough, I'll sacrifice - though somewhat grudgingly - the ability to see the brush work.

Because I approach the business side with more emotion than calculation, I hope to sell my work to people who also appreciate the handcrafted.  I want them to buy and enjoy the original whenever possible.  Thus, I keep my prices lower to make my paintings affordable to most, and I don't make reproductions.  In this way, I try to encourage the purchase of original art.

Selling - and making - original art is much more satisfying to me than selling reproductions.  If I wanted to make real money fast, I'd go back to my old day job.

Tuesday, January 3, 2012

New Pastel Video Demonstration - Monochromatic Underpainting


In keeping with my "paying it forward" concept, yesterday I shot and edited a new, 7-minute video demonstration for you to enjoy.  You can view it on my YouTube channel.

"Long Canyon Cliff" 9x12, pastel
In this pastel demonstration, I show how you can make use of a monochromatic underpainting to help capture light and shadow patterns effectively before moving to local color.  Although this is typically a studio technique, I have adapted it for use in the field.   One problem we all have when painting outdoors is keeping track of shadows and values.  When you're worrying about color, it's so easy to get sidetracked.  I call this the "Heartbreak of  Slipping Values."  Once you slide into the ditch, it's hard to climb out.

I gave a similar demonstration at the biennial IAPS (International Association of Pastel Socieities) convention a few years ago, and it was well-received.  I hope you like this video version, too.

For other video demonstrations, please visit my Lulu store:  http://lulu.com/spotlight/miragenm.  And by the way, the demonstration painting (above) itself is for sale - $100 + $10 shipping.  Let me know if you're interested.

Sunday, January 1, 2012

George Browne at Mt McKinley - and Happy New Year!


Well, we've made it safely to 2012 with our New Year's resolutions intact.  It's hard to break those resolutions only a few hours into the new year.  Mine include painting more intelligently and with direction, all with the goal of making me a more consistent painter.  What are your resolutions?

The other night, we were watching an episode of Ken Burns' The National Parks: America's Best Idea.  It was the third episode, which has a segment on Alaska's Mt McKinley, now known as Denali.  Burns presented a movie clip of the 1947 Washburn expedition preparing to make the ascent.  I suddenly caught sight of what looked a lot like a painter standing in front of a Gloucester easel.  I had to "rewind" and watch that clip again.  Burns didn't mention a painter in the narration.

After some research, I discovered that the expedition did, indeed, take along a painter.  It was George Browne, a one-eyed outdoor enthusiast who made 23 paintings on the climb.  Above is a still from the Burns movie, and here is one of his paintings.


Coincidentally, the Anchorage Museum will be hosting an exhibition of Browne's work this spring.  I wish I could visit Anchorage to see it.  From the Museum's website, here's a little about Browne and the exhibit:
Mt. McKinley has been painted innumerable times, but nobody tackled the scenery quite like George Browne (1918-1958). Undaunted by blindness in one eye, the outdoors enthusiast not only conquered the tallest mountain in North America, he created 23 oil paintings during the climb. 
These paintings are on view in the George Browne: Art of Altitude exhibition Feb. 3 through May 1 
In 1947 Browne reached the 20,320-foot summit as part of a Bradford Washburn-led scientific expedition. It was the fulfillment of a family goal that stretched back to his father Belmore’s unsuccessful attempts some 35 years earlier.  
Most artists in the younger Browne’s place would have chosen to sketch in pencil, waiting to paint until they returned to solid ground. Not Browne. In addition to his climbing gear and food, he carried canvases, brushes, paint and an easel. 
As the group ascended the mountain, he painted during periods of good weather. He carried the painted canvases in a plywood box designed so the wet paintings wouldn’t smear in transit.  
Some of Browne’s Mt. McKinley paintings have patches missing; others remain unfinished because snowstorms obscured his view. Mother Nature thwarted him completely at 11,000 feet, when temperatures reached 20-below zero and his paint froze.  
Browne died in a hunting accident in 1958 before he could touch up his Mt. McKinley paintings. They were never exhibited during his lifetime.
I admire Browne for making that trip.  I don't know if there's a more "extreme painter" !