
 |
| One of the three products I've used for covering up old paintings. |
Yes, you can paint over old paintings—so long as you take certain precautions.
You may recall that I recently wrote about going through my inventory of old paintings and culling them. I very briefly mentioned what I do with the culls. I thought I'd take a moment now to offer a little more detail.
Warning #1: This applies only to oil paintings made on a rigid support. I don't recommend the approach for acrylic paintings or paintings made on stretched canvas.
Warning #2: As much as I try to use nothing but archival materials in my painting process, I have no proof that the stain-blockers I use are archival. Based on my layman's knowledge of chemistry and physics, I believe the end product will stand the test of time. (Honor's Chemistry was as far as I got in college, but I did win the Georgia Tech Distinguished Math and Science Scholar awards in high school. And I've read a lot of popular science books since then. All that said, I do welcome feedback from conservators!) I recommend you proceed cautiously and don't paint any masterpieces.
Here are the steps:
1. I sort the culls into two piles: One of paintings with significant impasto and texture, and another with little or none. The pile with lots of texture I scarify with a knife and toss in the trash; these paintings will be too much trouble to sand down. The second pile will take less work, so these I keep.
2. Any varnish on the paintings first must be removed. I take the appropriate solvent and dampen a lint-free sock with it. I rub the surface with the sock until all the varnish is gone. By the way, after varnishing a painting, I always write on the back of the panel what type and brand of varnish I used. This information will be useful in the future if you (or a conservator) need to remove the varnish. Not all varnishes use the same solvent. Damar varnish, for example, must be removed with turpentine. I use Gamblin's Gamvar, which must be removed with mineral spirits. I use Gamsol.
 |
| Putty knife and sanding block -- perfect for removing texture. |
3. Once the solvent has evaporated, I use a putty knife to scrape off as much of the obvious texture as I can. Then, using a sanding block, I give the surface a light sanding. I don't sand all the texture off; just the texture that would look odd poking up through the new paint. Sometimes you don't want the texture of a tree showing in the over-painted sky.
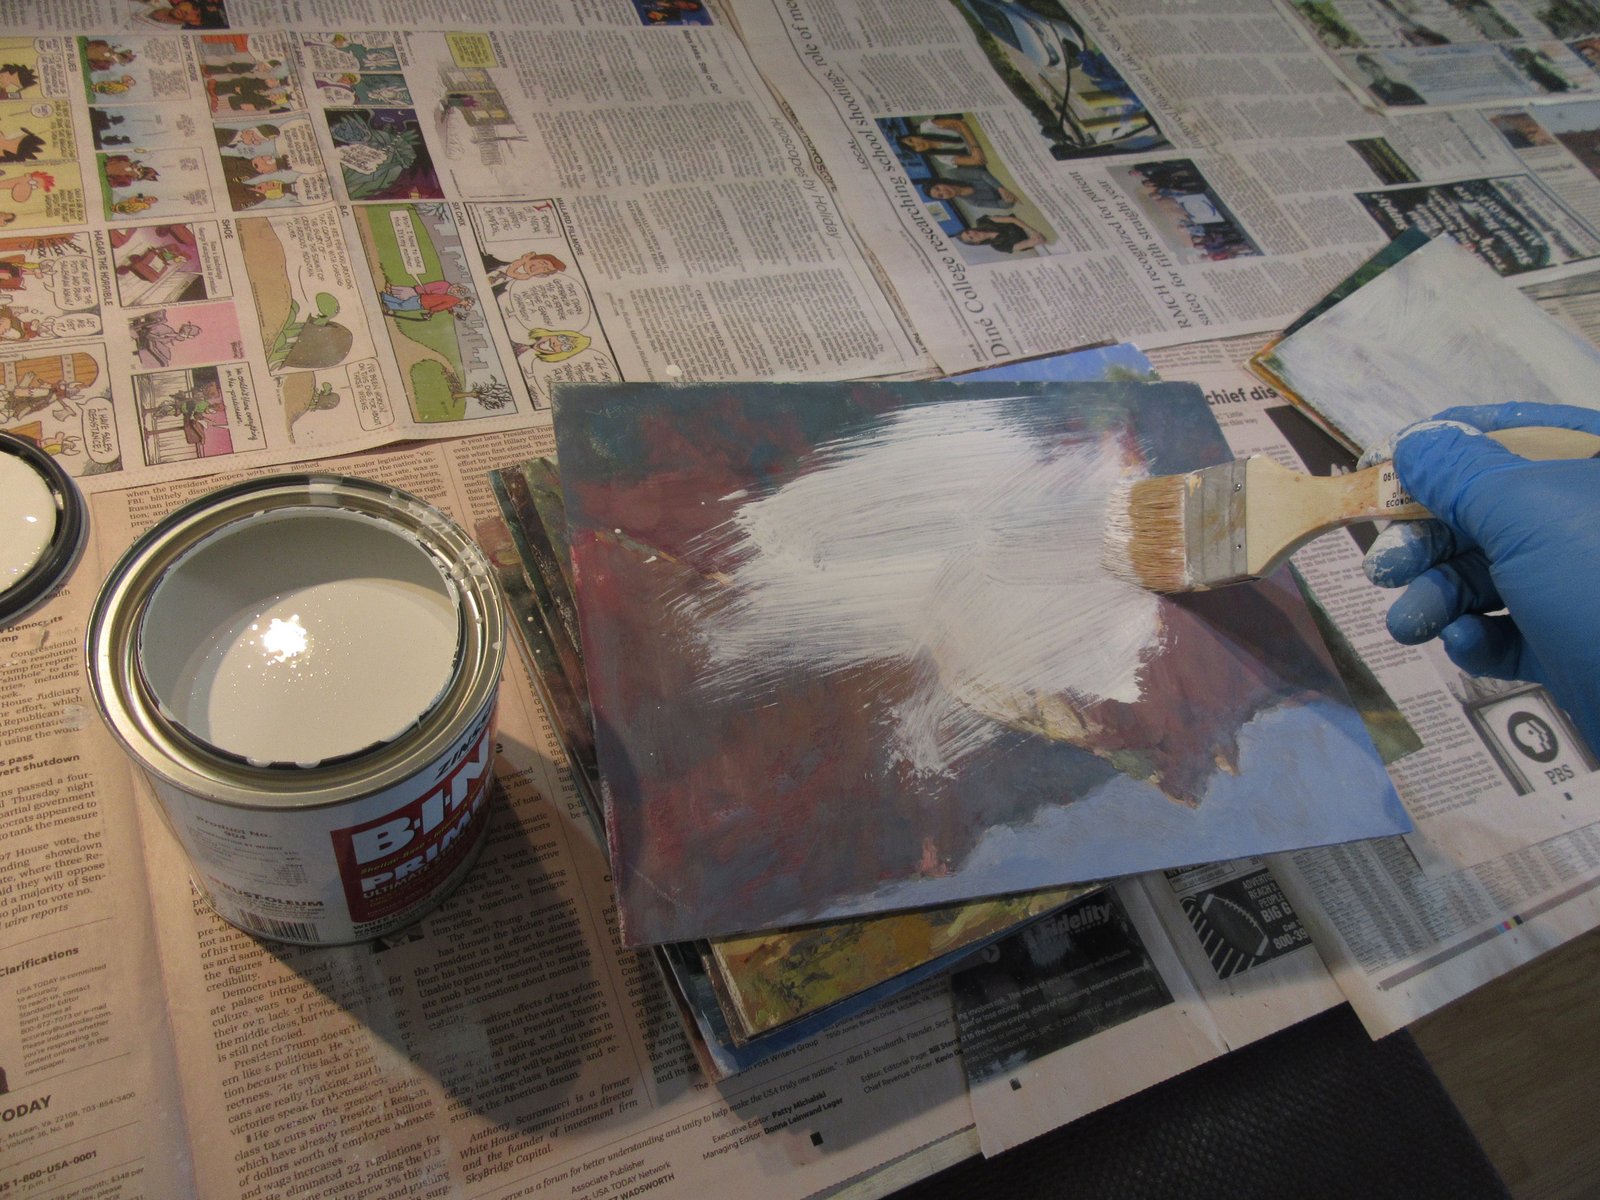
4. Next, I brush on one coat of stain-blocker with a 2" gesso brush. My choices for stain-blocker: Winsor & Newton's Oil Primer, Zinsser's B-I-N (a shellac-based product suspended in ethanol) or KILZ (the oil-based version, not the latex one.) I do not use a latex or acrylic stain-blocker as this layer will not adhere properly to the layer of old oil paint and will delaminate. Also, I have been tempted to use two coats to completely obliterate the old painting, but I've found that one layer is really sufficient. If the old painting shows through, it's just a very faint ghost image, and the stain-blocker layer is still white enough to act as a proper ground.
 |
| I don't show it here, but in the plastic container on the left I have some 90% rubbing alcohol. This is perfect for cleaning the brush. |
 |
| This is a single coat of stain-blocker on the old painting. |
5. Finally, once the panel is dry, I flip it over, and if there is writing on the back, I use stain-blocker to cover it up. Just in case I paint a masterpiece.
I really like painting on these old panels. The pre-existing texture adds a certain energy to the new painting, and the surface has a nice feeling under the brush.