 |
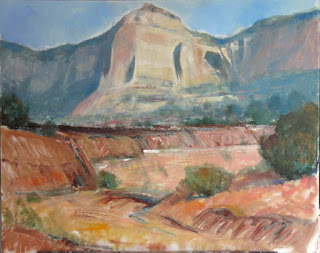
| "Arroyo" 24x30 Oil - Available Yes, you saw it before in an earlier post, but now I want to tell the story. |
I'm a painter, but sometimes for a project, it just feels right to draw. That's the way I felt when I started "Arroyo," the painting at the top of this post. As most of you know, I usually paint in a small format, but this subject, La Ventana Natural Arch near Grants, New Mexico, demanded a larger canvas—24x30. When I put the canvas up on the easel, several acres of white confronted me. I suddenly lacked the confidence to just start in with a brush. I decided I needed to get some drawing down first.
My first thought was pencil or charcoal, which would give me more accuracy than a brush. But of course, pencil lines can show through transparent passages, and charcoal can muddy the color. Then I remembered my box of oil sticks.
Made of nothing but pigment and linseed oil, oil sticks are fatter than those big green pencils we were given in kindergarten. They come with a blunt end and a sort of "skin" that you have to trim off with a knife before using. My set, Richeson Shiva Student Grade PaintStiks, has six colors: white, yellow, red, green, blue and brown. These aren't enough colors to do serious work but certainly enough to get a drawing down and the painting started.
Using colors that were akin to the ones that I envisioned in the final painting, I started drawing. Next, I blocked in color with the PaintStiks, dipping the ends in Gamsol to liquefy the color so I could apply it more easily and fill shapes. Once that was done, I went back in with my biggest brush and Gamsol to liquefy the color further and push it around for a thorough block-in. From there, I proceeded with my usual M.O.
I will say that drawing with oil sticks really freed me up. It was comforting, as I'm a natural drawer and it comes easily to me. I'm sure I'll do more of this in the future, especially for larger studio works.
Below I share my step-by-step photos with you.
By the way, this project came out of a painting session with one of my Private Intensive Painting Program students. Although I didn't sketch La Ventana itself—it was still in shadow—I made color sketches of the surrounding sunlit rocks and arroyo and also took photographs. To figure out what the sun would do on La Ventana, I made use of the Internet and found several photos that showed the pattern of light and shadow. I didn't copy any of these photos but just used them as a reference for the pattern. The color and the "feeling of the moment" all come from my sketches of the surrounding terrain.
 |
| Oil stick drawing |
 |
| More drawing, with oil stick dipped in Gamsol |
 |
| Washing in color with Gamsol |
 |
| And from here on, continuing with brushes |
 |
| I had a hard time with the arroyo foreground. I wanted to make it interesting, but not too interesting, so I removed that dark shadow... |
 |
| ...and then put it in again... |
 |
| ...only to finally remove it. Finished. Arroyo, 24x30 Oil - Available |


