Authentically Human! Not Written by AI!
All Content Copyright © Michael Chesley Johnson AIS PSA MPAC

Sunday, September 29, 2019

What Do You Consider to be a Successful Day of Plein Air Painting?

Early Spring Day 11x14 Oil - Available
This finished painting was made over two sessions.  I'd
consider it frameable, for the points listed below in the text.
I felt the day was a success when I completed it.

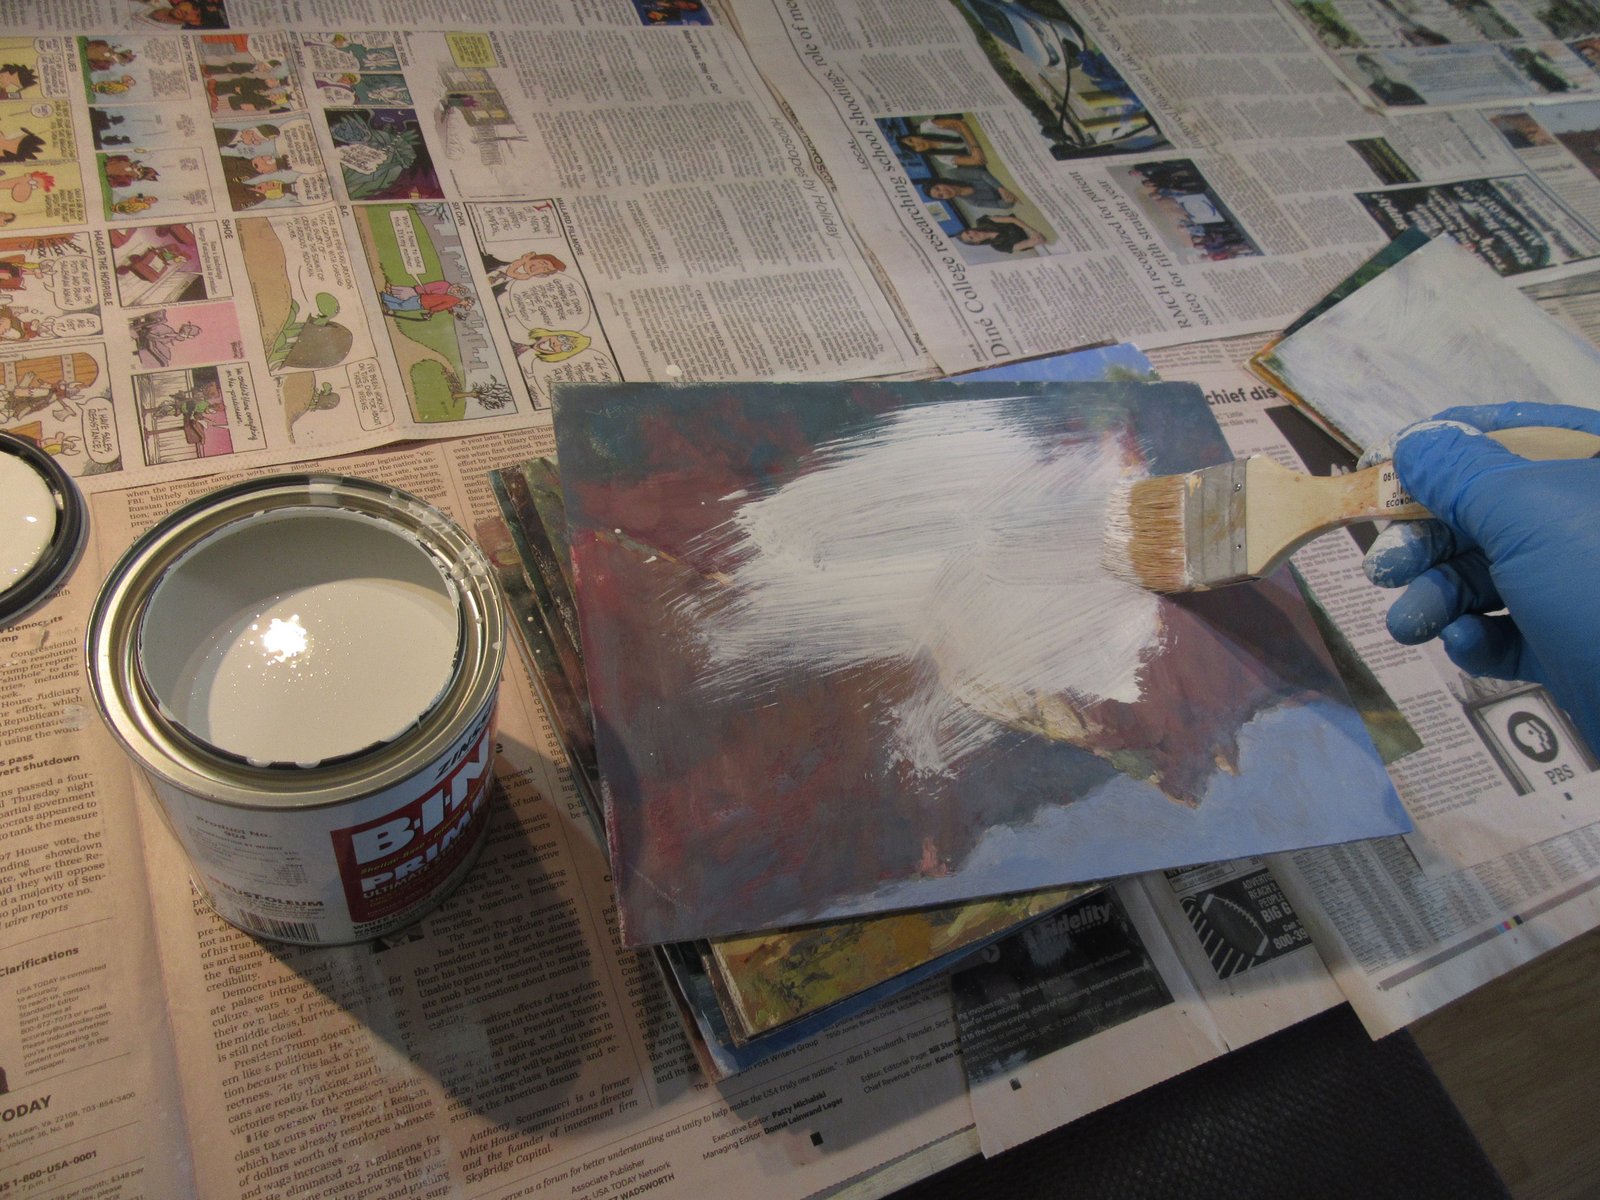
Ramah Rocks 9x12 Oil Study
On this day, my goal was to just go out and do some closeups
of the local rocks and cliffs.  A downpour stopped me before I
finished, but I accomplished my goal and felt good about the day.


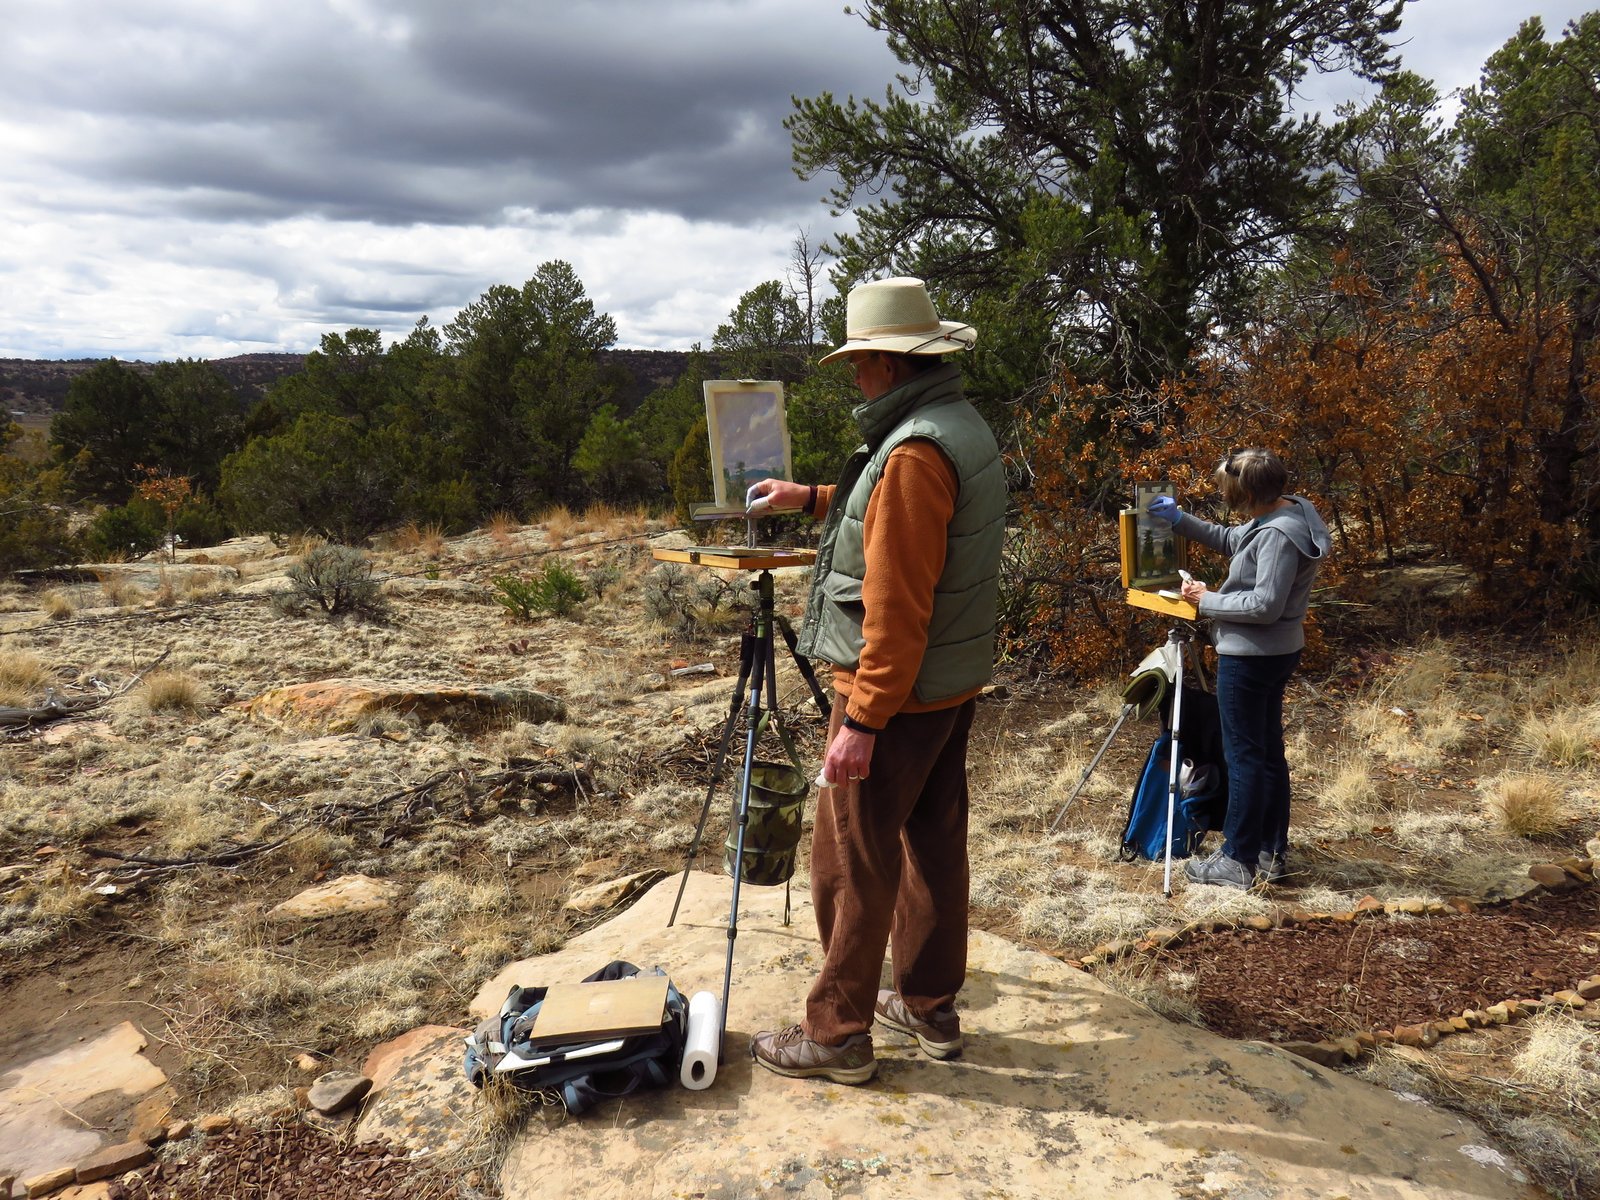
When I'm painting in a plein air event—and I've been in many—I consider the day a success if I've completed at least two paintings that are worthy of framing.  So many items have to be ticked off my checklist:  Interesting subject that is representative of the event's location, a good design with a few simple shapes and values, a harmonious color scheme that evokes a certain mood, and mark-making that looks loose but not sloppy.

But this is just one measure of success.  Others involve less stress but can have the same degree of satisfaction.  It all boils down to what the goal is for the day.  Having a definite goal when you go out helps.  Here are some possibilities. I find it helpful to start each goal statement with "Today my goal is to – " and then fill the in blank.

  • Today my goal is to gather reference material.  Success is coming home with color studies, some photos plus plus value sketches that explore design possibilities. 
  • Today my goal is to work on a problem.  Success is coming home with studies that help me understand some aspect of the landscape that confuses me.
  • Today my goal is to work on a skill.  Success is coming home with practice pieces that fine-tune my ability to render the landscape.
  • Today my goal is to explore a new location.  Success is coming home with some sketches—pencil or color—and some photos that capture the things that make the location unique and interesting.
  • Today my goal is to explore a new medium or technique.  Success is coming home with a new understanding of the medium or technique as it relates to outdoor painting.
  • Today my goal is to relax.  Success is coming home with paintings, sketches—or just the memory of having looked at the landscape with the eyes of a painter.

What do you consider to be a successful day of plein air painting?

Wednesday, September 25, 2019

The Great Painting Cull, Part 2

One of the three products I've used for covering up old paintings.

Yes, you can paint over old paintings—so long as you take certain precautions.

You may recall that I recently wrote about going through my inventory of old paintings and culling them.  I very briefly mentioned what I do with the culls.  I thought I'd take a moment now to offer a little more detail.

Warning #1:  This applies only to oil paintings made on a rigid support.  I don't recommend the approach for acrylic paintings or paintings made on stretched canvas.

Warning #2:  As much as I try to use nothing but archival materials in my painting process, I have no proof that the stain-blockers I use are archival.  Based on my layman's knowledge of chemistry and physics, I believe the end product will stand the test of time.  (Honor's Chemistry was as far as I got in college, but I did win the Georgia Tech Distinguished Math and Science Scholar awards in high school.  And I've read a lot of popular science books since then.  All that said, I do welcome feedback from conservators!)  I recommend you proceed cautiously and don't paint any masterpieces.

Here are the steps:

1. I sort the culls into two piles:  One of paintings with significant impasto and texture, and another with little or none.   The pile with lots of texture I scarify with a knife and toss in the trash; these paintings will be too much trouble to sand down.  The second pile will take less work, so these I keep.

2. Any varnish on the paintings first must be removed.  I take the appropriate solvent and dampen a lint-free sock with it.  I rub the surface with the sock until all the varnish is gone.   By the way, after varnishing a painting, I always write on the back of the panel what type and brand of varnish I used.  This information will be useful in the future if you (or a conservator) need to remove the varnish.  Not all varnishes use the same solvent.  Damar varnish, for example, must be removed with turpentine.  I use Gamblin's Gamvar, which must be removed with mineral spirits.  I use Gamsol.

Putty knife and sanding block -- perfect for removing texture.

3. Once the solvent has evaporated, I use a putty knife to scrape off as much of the obvious texture as I can.  Then, using a sanding block, I give the surface a light sanding.  I don't sand all the texture off; just the texture that would look odd poking up through the new paint.  Sometimes you don't want the texture of a tree showing in the over-painted sky.


4. Next, I brush on one coat of stain-blocker with a 2" gesso brush.  My choices for stain-blocker:  Winsor & Newton's Oil Primer, Zinsser's B-I-N (a shellac-based product suspended in ethanol) or KILZ (the oil-based version, not the latex one.)   I do not use a latex or acrylic stain-blocker as this layer will not adhere properly to the layer of old oil paint and will delaminate.  Also, I have been tempted to use two coats to completely obliterate the old painting, but I've found that one layer is really sufficient.  If the old painting shows through, it's just a very faint ghost image, and the stain-blocker layer is still white enough to act as a proper ground.

I don't show it here, but in the plastic container on the left
I have some 90% rubbing alcohol.  This is perfect for
cleaning the brush.

This is a single coat of stain-blocker on the old painting.

5. Finally, once the panel is dry, I flip it over, and if there is writing on the back, I use stain-blocker to cover it up.   Just in case I paint a masterpiece.

I really like painting on these old panels.  The pre-existing texture adds a certain energy to the new painting, and the surface has a nice feeling under the brush.

Sunday, September 22, 2019

Cold Wax Medium and Plein Air Painting

Season of Storms I
8x10 oil/cold wax - available

In my last post, I gave an overview of Gamblin's Cold Wax Medium.  I've used it mostly in the studio until now.  I always like to try new things in the studio before heading to the field where time is an issue.  In the studio, I found that CWM offers endless possibilities with collage and layering as well as additive (building up) and reductive (scraping down) methods of painting.  But what about outdoors?

One of the benefits of CWM is that it is a paste.  It will stay on your palette where you put it, unlike some other mediums (Galkyd Lite) that run and require a cup.  I dislike cups because they have to be cleaned, and if you have one with a screw-on lid and you don't clean it, the lid seems to get welded tight.  And then the cup gets thrown away.

Two other benefits.  CWM will thicken the paint and also make it more translucent.  These are properties I'm more likely to benefit from in the studio.  In the field, I want the paint to flow easily and not thicken, unless I'm using a painting knife rather than a brush.  Since I'm painting alla prima, getting the painting complete in more or less one session, I'm not looking at translucency as a benefit so much as I am at transparency.  I like my shadowed areas to be transparent to give them more depth; sunlit areas I make more opaque.  I suppose translucency might be factored in, and maybe it would be good to apply CWM over the shadowed areas to increase the sense of depth.

One concern I had with going outdoors was heat.  CWM is basically just beeswax with Gamsol and a little alkyd resin.  At room temperature, it is a paste; when the Gamsol evaporates, CWM becomes as hard as a beeswax candle. (The surface is actually quite durable.) The melting point of CWM is 155°F, which seems high, but it will soften as it approaches that temperature.

Block-in before using Cold Wax Medium

When I went out on a sunny day to paint with CWM, the air temperature was about 62°F.  I set up in the full sun.  At 7000 feet altitude, where I live, even in mid-September the sun can be quite intense.  I don't know how warm my palette got, but the sun was beating down on it.  My palette is the smooth wooden one that comes with the Guerrilla Painter 9x12 pochade box; I've used it for years, but I wipe down my working area faithfully so you can see the bare wood, which is a yellowish mid-value.  Around the outer edge, where I place fresh paint, I don't wipe it down clean, so there is always some dried paint there.  Using a knife, I placed a couple of dabs of CWM on the right side, where the wood is a bit darker because of some old paint.  Because this area is darker, it absorbs more light from the sun and gets warmer than the rest of the palette.  The dabs of CWM became noticeably less pasty and more fluid as they warmed up.

My container of Cold Wax Medium is in the upper right;
the dabs of CWM are on the right side of the palette.

Toward the finish

For the block-in, I didn't use any CWM at all but Gamsol to thin the paint just enough so I could get coverage.  In  the next and succeeding layers, I used CWM in every mixture, using my brush to pick it up and add it.  The CWM never got so fluid that it ran, but because it had softened in the heat, it really made the paint flow nicely.

Now, a day later, the painting is just a little tacky and is nearly dry.  The surface has a consistent matte finish to it.  When it's completely dry, I can varnish it with another layer of CWM.  Another option is Gamvar, which is fully compatible with CWM.

Will I use CWM outdoors regularly?  I'm not sure yet.  The other products I use outdoors - Galkyd Gel and Solvent-Free Gel - work just fine for me.  I may end up using CWM just in my studio practice, where I can take full advantage of its properties.

Season of Storms II
8x10 oil/cold wax - available

Thursday, September 19, 2019

Working with Gamblin's Cold Wax Medium

Dreams of Our Mother
8x10 oil/cold wax / NFS
In this studio piece, I embedded photographs into the wax
and used a variety of tools to manipulate each layer.

The same painting in raking light to show texture

Look through the web site for Gamblin Artists Colors, and you'll come across a curious product:  Cold Wax Medium.  Most of us oil painters are familiar with the more common mediums, such as the traditional ones made with linseed oil, turpentine and damar resin, or the more modern ones such as Liquin and, of course, Gamblin's own Galkyd.

But Cold Wax Medium?

Wax has been used in painting ever since ancient Rome, and maybe even before that.  Most often, it took the form of encaustic—that is, beeswax that has been softened by heat and to which pigment has been added.  The heated wax is then applied to a surface with a brush or other tool and, when cool, becomes a very durable layer.  More recently, though, a way of using beeswax that does not involve heat was invented.  In the case of Gamblin's Cold Wax Medium, the beeswax is softened with Gamsol (odorless mineral spirits) to make a paste and, to help the wax to harden more quickly, a bit of alkyd resin is added.  No heat is required.

Here are some of the tools I used in the creation of the above painting.

Yes, you can even use a brush!

Cold Wax Medium can be used in three ways.  First, as with any medium, you can mix a little into your paint.  This will thicken the paint and make it somewhat translucent; it will also give it a matte finish upon drying.  Second, you can use it as a varnish.  It will restore the color saturation and value contrast as would any varnish.  You can then buff it, as you would shoe polish, for a more satin finish.  (Does anyone polish shoes these days?)  Third, you can use it more like an encaustic by mixing pigment (or oil paint) directly into it and then apply it with a variety of tools.  In this last method, you also can embed paper and other objects, build it up, scratch it down—the mind boggles at the possibilities.  One of the things I love most about it is that the wax's natural translucency lets me create a depth that I can't achieve with oil paint alone.

To help understand some of the technical matters, I purchased what is the reference book:  Cold Wax Medium: Techniques, Concepts and Conversations by Rebecca Crowell and Jerry McLaughlin (Squeegee Press, 2016).  The book gives a history of the medium, discusses different versions of it (Gamblin isn't the only maker), informs about materials and tools, and finally takes the reader through a variety of different methods for using it.  I found it very helpful. The Gamblin site also has a good page on materials and methods

(Update:  Dave Bernard of Gamblin suggests the following:  "Try first blending in 25-50% Galkyd Gel or Solvent-Free Gel into the Cold Wax. It makes a beautiful medium that dries harder and more flexible than using CWM alone.")

You may now be asking:  But how well does Cold Wax Medium work in plein air painting?  I hope to answer that in my next post.

Here's one more oil/cold wax painting from the studio:

Ravens at Sunset
12x9 oil/cold wax
sold

Monday, September 16, 2019

The Great Painting Cull

Sorting out piles:  the Good, the Bad, the Ugly


A few weeks ago, I arrived at my winter studio in New Mexico.  Piled up in wooden boxes and crates and plastic boxes are hundreds of small paintings; stacked up in a closet are scores of larger ones.  Except for the paintings that have sold, these paintings more or less cover the entire Southwest portion of my career as an artist.

That's a lot of years and a lot of paintings.  As with any painter's inventory, the paintings vary in quality.  Some I look at and say, “Wow—did I actually paint that?”  At others, I cringe and wonder why I didn't scrape them off in the field.  Many, however, fall in between these two extremes.

Half-heartedly over the years, I've gone through the paintings and destroyed a few of the cringe-worthy ones.  Right now, though, I want to reduce the inventory even more, so I've embarked on the Great Painting Cull.  I'm being more discriminating with the ones that look merely “okay.”

Over time, we become not just better painters but also better critics.  When we look at our old work, we see the flaws.  Older work no longer pleases us like it did when we were just getting started.

Some artists recommend not discarding old work that no longer meets your current standards.  The reasoning is that there is always something still to learn from them; and also that they remind us of how far we've come.  Personally, I think these are poor reasons.  You already have learned from them—that's why you now recognize the flaws.  And if you need a reminder of your days as a beginner to keep you humble, well, just keep one.

I am, however, saving a few that are technically poor but which still offer pleasant memories.  Some still hold that spark of excitement from when everything was new.  These I'll keep, but hidden away for my eyes only.

What will I do with the culls?  I'm always in need of panels (or paper in the case of pastel) to sketch on.  If the paintings don't have too much surface texture, I'll first use Gamsol to remove any varnish and then give them a light sanding.  Next, I'll paint over them with one of three archival products:  Either Winsor & Newton's Oil Primer, Zinsser's B-I-N (a shellac-based product suspended in ethanol) or KILZ (the oil-based version, not the latex one.)  Once dry, they'll be perfect for sketching.  I also apply a coat of the same to the back where I may have written information about the now-destroyed painting—just in case I paint something I love and want to give it a title.

Pastel paintings, I just take a stiff brush to and erase them outdoors.  Some of my dust may soon be showing up on a countertop near you.

As for the oil paintings with too much surface texture, I'll either scarify them or cut them in half and toss.  Last year, I used one of them to board up an unwanted cat door that came with the house.  There are probably other uses for these, so maybe I'll keep a few on hand for construction projects.

Saturday, September 14, 2019

Etiquette for Painting Workshop Instructors

Workshop in St Andrews, New Brunswick, Canada
Learn more about my plein air painting workshops at www.MChesleyJohnson.com/workshops/

Having laid out rules of etiquette for students, it's only fair that I give equal time to instructors. Instructors are also sometimes at fault for bad manners. Lack of manners is sometimes just a lack of awareness. With that in mind, here are some tips for those of you who teach. 
  • Give students what they paid for, and then some. I've heard stories of teachers wandering off for a couple of hours to let students paint on their own, or of only painting a demonstration and then giving no further instruction for the day.  If the students are expecting this, fine. But do deliver what you advertise. It's a good idea before a workshop to review the workshop description so you know what your students expect. 
  • Work with, not against, the workshop volunteers. They may have never worked with you before and may not know what to expect. Discuss with them before the workshop exactly what your needs are (tables, easels, lunches, plein air location list, etc.) but also what their expectations are.  Recognize them publicly for their efforts.
  • Start promptly and finish promptly. If you're still waiting for a student to arrive before beginning the session, don't. Get started right on time. Also, students may have a life outside the workshop, so don't run late. If they traveled for the workshop, they may have come with family or friends who may be expecting them for dinner or a hike. 
  • Don't drag students around all morning looking for the perfect painting spot. Do your homework by getting to the workshop a day early to preview locations. You don't want to be surprised on your first day to discover parking is limited, that there are no restrooms or that the location is too far to drive to. Preview all locations, and make sure you have a couple of alternates. 
  • Give frequent breaks. You may be a marathon painter, but not everyone is. A short break every hour or so will refresh them so they can absorb more. You might use a break yourself. (I know I am guilty of this, and I invite students to stop me!)
  • Respect where your students are coming from skill-wise. Don't forget that you, too, were once a raw beginner. Try to remember what it was like when you were struggling to learn. Teach with patience and understanding. Also, students have different backgrounds, so try to use this variety to enrich the experience for everyone. 
  • Listen to your students. Give them time to ask questions. Treat every question, however basic, as one deserving serious attention. But watch out for the needy student; give equal time to everyone. If someone asks a question that is off-topic, offer to answer it during lunch or a break. Don't be afraid to suggest that the topic is better answered in a different workshop. 
  • Don't paint on student paintings without permission. There's no faster way, of course, to show what you mean than by painting directly on top of a student's work. But some students prefer that you don't touch their paintings. Ask before grabbing a brush. 
  • Be kind, but be also fair and honest. You aren't doing your students any favors by giving nothing but praise. If a painting can be improved in some way, say it. Some students do better with blunt criticism than others; proceed cautiously until you know how much they can take. 
  • Finally, stay upbeat. You may be exhausted after having traveled two solid days to get to the workshop. You may be unhappy with the workshop facilities.  You may be in the middle of some life crisis. Whatever, keep it to yourself. Students don't need to be burdened with any of it. Save your grumpiness for your hotel room. 
And above all, be encouraging!  Not matter how a student may struggle, respect that student's efforts and encourage them where you can.

Wednesday, September 11, 2019

Etiquette for Painting Workshop Students

Teaching a workshop in Springfield, Illinois.  Every student was perfect!

Who hasn't been in a painting workshop where one student talks constantly without giving the others a chance to speak?

I think we've all been there.  I've been both student and instructor, and I've experienced workshops from each end.  In my view, students will have a more rewarding experience if they remember a few simple rules of etiquette.  And I'm not talking about just first-time students.  This goes for everyone, even workshop junkies, who should know better.

I will say that most of my workshops have had very well-behaved students, and it has been a pleasure to teach every one of you!  I've made some wonderful friends.  But for a very few, and especially for first-timers, I offer the following.  I know it's a lot of "don'ts," but in your mind, you can easily translate that to a lot of "dos."
  • Be on time.  It's distracting to show up late and cause a commotion.
  • Bring what's on the supply list.  If I am teaching a wet underpainting technique in pastel and ask you to bring a certain kind of paper, bring it.  If you don't, you won't be able to practice the technique.
  • Respect the instructor.  Assume he knows more than you about the workshop topic.  If it turns out he doesn't, then disagree politely.  If the instructor argues with you and you know you're right, let it go.  It's only a workshop, and it'll all be over soon.
  • Follow the curriculum.  You're there to learn from the instructor; going your own way is just treading over old ground.   Make an effort to at least try what the instructor is teaching; if it works for you, great, but if not, you can abandon it after the workshop.
  • Follow the rules.  Instructors will often set ground rules for the workshop, such as what time the workshop begins, distance limits for a plein air workshop, and so on.  The rules were set to maximize your experience and to make for a successful workshop.
  • Keep your questions relevant.  Especially during painting demonstrations!  Nothing throws the instructor off-track like questions from left field.  Questions such as "Where'd you study?" are out of place when he is showing you how to mix a neutral grey.  Save that question for a coffee break. Stay on-topic.
  • Respect your fellow students.  Most workshops will have students coming from a variety of backgrounds and skill levels.  If you are more advanced, grit your teeth and bear it; you will still probably learn something.  If you are behind the others, don't be too needy; the others paid as much for attention as you did. 
  • Here are some corollaries to this last rule.  Don't block the view of another student during a demo.  Don't grab space.  Sometimes workshops, especially studio ones, can be crowded, so respect the space of others.  Share!  Also, don't gab while others are trying to concentrate during the painting session.  Don't play with your electronic devices.  Turn them off or, if you must receive a call or text, set them to "vibrate".  Go outside the classroom if you need to check your email or stock prices.  And finally, if in the studio, don't ask to put on some music. No one can ever agree on a playlist.  If you must have music during the painting session, bring earbuds.  But make sure you don't mistakenly send an "I'm not available" signal to the instructor when he makes his rounds.
  • Don't monopolize the critiques.  Everyone, like you, is paying paying for the instructor's feedback, not yours.  Ask questions that are relevant to the topic at hand.
  • Don't critique other student's work during critique sessions unless the instructor has invited you to do so.  Conflicting or additional comments may confuse the student whose work is being critiqued.  (This happens a lot, because those offering critiques think they are being helpful; unfortunately, they aren't.)
  • Ask before photographing or recording.  Most instructors are fine with this, but it's good to ask first.
  • Respect break time for the instructor.  Teaching is very tiring, and we instructors prize our time to recharge.  If you have more questions that the class period permits, try to arrange a suitable time. 
  • Don't ask for a critique on work you didn't do during the workshop, unless the instructor has asked you specifically to do that.  "I brought a dozen paintings I did this past year--can you take a look at them and tell me what you think?"  The instructor can't take class time out to do this, and chances are, cutting into the instructor's personal time outside of class...well, read the above tip about respecting break time.
I think these are all easy rules to follow.  Most times, bad manners are an accident, with the person at fault simply not paying attention.  Being aware of others is the best way to make sure everyone has a happy workshop experience.

Saturday, September 7, 2019

Announcing a New Season for the Private Painting Intensive

"Autumn Splendor" 20x28 Pastel
For the Private Painting Intensive, we'll be painting in places like this.

After nearly 2800 miles, Trina, Raku and I are back home in New Mexico.  Unlike most of our cross-country trips, on this one I taught no workshops, and we headed west more or less directly.  (We did stop in the artsy town of Eureka Springs, Arkansas, for a day to catch our breath.)  One of the reasons we came straight here was so I could get the studio ready for the next season of my Private Painting Intensives.  I'm excited to share my time and knowledge with a few experienced painters who are serious about improving their craft.

If you haven't heard about the program, the idea is simple.  You live in our house, take your meals with us, and you and I work side-by-side in the field and in the studio.  The program is entirely customized to your needs, based on a questionnaire and some recent paintings of yours; I draft a proposal, and with your approval, we proceed.  The cost for the program is only USD $1400, which includes six nights' lodging plus all meals.  (I offer a tuition-only version for $700.)  I also give you three months of followup if you have questions or need critiques.  For this exclusive program, I take only one student at a time, and I have scheduled only a few weeks.  You can find out more about the program and see the schedule at www.PaintTheSouthwest.com/sched_int.html and www.PaintTheSouthwest.com/faqs_int.htm.

Here a few photos from previous sessions. (You can see more photos and read about some of the previous weeks here.)

We paint a lot.

Sometimes, Trina leads a hike!  (By request.  It's not required.)

We usually have a picnic lunch at least once.

We paint even more.
And if the participant is up for it,
we may go to the Zuni pueblo
for a cultural tour with an archaeologist.

By the way, I still have room in the following all-level workshops.  If the Private Painting Intensive isn't for you, I'd love to work with you in Sedona or at Grand Canyon National Park!

October 23-26, 2019:  Grand Canyon National Park, Arizona – ONLY 3 SPOTS LEFT - Details at https://www.grandcanyon.org/photography-art-yoga/plein-air-painting/

November 5-8, 2019:  Sedona, Arizona – Details at http://www.paintsedona.com/sched_reg.html and http://www.paintsedona.com/faqs_reg.htm

Thursday, September 5, 2019

Master Class: Ultramarine Blue – Cool or Warm?

Same ultramarine blue square in the center, but surrounded by different colors.
Each square of ultramarie looks a little different, depending on what's surrounding it.

Cool or warm?  Well, it's both.  Or can be.  In some ways, it all depends on what you were taught and what art instruction books you've read.  One book will call it warm; another, cool.  To avoid fistfights among artists, it's best simply to describe the color as a blue that leans toward violet.  Other blues, such as cerulean and manganese, lean toward green.  Cobalt is the one blue that doesn't lean either way, and I call it the “primary” blue.

Whether a particular color is cool or warm also depends on context.  Surround ultramarine blue with hot orange, and it might seem quite cool.  Surround it with a neutral grey, and—to my eye—it takes on a warm cast.

We often think of blue as being generally a cool color.  If we look at the spectrum, at one end we have the warm colors of red, orange and yellow.  At the other, we have the cooler colors of green, blue and violet.  Red, orange and yellow “feel” warm to us because our limbic cortex (the so-called “lizard brain”) associates these colors with fire, whereas green, blue and violet “feel” cool because we associate them with ice.

Interestingly, when we are talking about light, as in a spectrum, the temperatures are actually reversed.  In physics, red, orange and yellow have longer wavelengths which require less energy to create them and thus less heat; these are considered cool.  Green, blue and violet have shorter wavelengths which require more energy and thus more heat; these are considered warm.  In the colors of visible light, red is the coolest and violet, the warmest.  The light from a yellow candle flame has a color temperature of about 1850°K (degrees Kelvin).  The light of the clear blue sky toward the pole can be 15,000°K or greater.

If this last paragraph confuses you, don't worry.  It has nothing to do with painting.  Instead, when you pick up a brush, rely on your lizard brain to tell you what looks warm and what looks cool.  And remember, too, that the temperature of a color is influenced by the other colors around it.

Here are two paintings in which each sky is painted with a different blue.  What kind of day does each blue suggest to you?

Cerulean Blue
(Gamblin's cerulean blue has phthalo blue in it.)
Perched 14x11 Oil - Available

Ultramarine Blue
Stand Alone 12x9 Oil - Available


Sunday, September 1, 2019

August's Most Popular Posts

As I mentioned last month, I've started keeping track of my most popular posts.  At the end of each month, I'll announce the top three,  just in case you missed them.  So, without further ado, here are August's top three posts!

#1:  Master Class: Color Palettes and Color Gamut


#2: Choosing the Right Dimensions for your Painting


#3: When is a Painting Finished?