 |
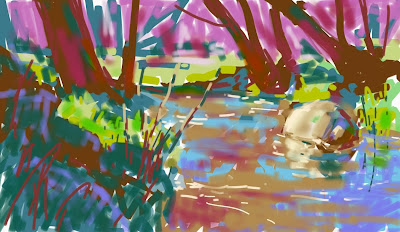
Spring Creek Sketch
Medium: Binary Digits, 1280x800px |
One reason that I love painting so much is that I worked with computers for many years. Picking up a brush feels so good after pecking at a keyboard and staring at a screen. Computer work was like pulling weeds in the vegetable garden; painting is like gamboling through a field with the breeze at my back and the good smell of the earth filling my nose.
So why am I experimenting with plein air sketching on my Kindle Fire HD?
For the longest time, there was an argument among those who run art contests about whether or not digital art should be allowed. "If your hands don't get dirty, it's not art," was one point. Another was, how can you possibly compare a painting made with a simple brush to an image created much less directly and with a much more complex tool? Also, isn't there something unfair about using a collection of circuitry, a stylus and tablet and several hundred dollars' worth of clever software to make art? And does the end result really qualify as art, since it isn't made by hand?
Well, I'm not going to answer these questions at the risk of causing virtual fistfights among readers.
Regardless, I like to get my hands dirty when I paint. But I'd seen some sketches that David Hockney had made on his iPhone, plus I've noted that some commercial artists have moved out into the plein air field with their electronics, too. I wanted to try my hand at pushing pixels in the outdoors. I liked the idea of taking out a painting kit that is much more portable than any of my "real" plein air gear.
As much as I like my Kindle Fire HD for basic functions like reading books, watching movies, checking e-mail and the like, it contains an eviscerated version of Android. It can't do everything a "real" tablet can. But I was able to find an app that would run on it - Autodesk's Sketchbook Pro for Android. It cost only $4.99.
I played with it in the house first, doing some life sketching. Black-and-white first to get used to some of the brushes, then a few color studies looking out the window. I always recommend to students, if they are trying a new medium, that they get comfortable with it in the studio before taking it outdoors. I'm glad I did, because it saved me a lot of headaches trying to figure out the brush tool and the color mixing.
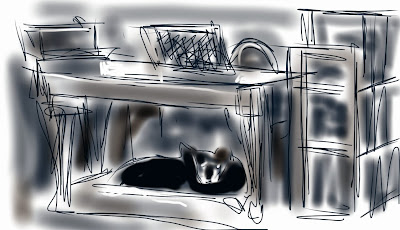 |
| Saba under the Desk |
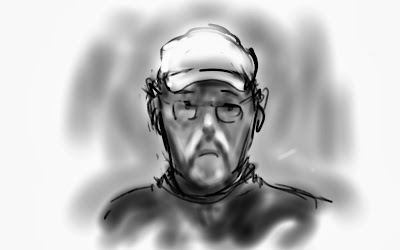 |
| Self-Portrait |
My worries:
- Not enough brush control
- Not enough color-mixing options
- Battery time
- Screen "washout"
Well, it turns out I didn't have to worry about battery time. The Kindle Fire HD has a good battery, and even though it wasn't fully charged, I was able to paint a good half-hour or more - and that's with the brightness turned on full to compensate for screen "washout." I sat on a rock in the shade, and the 8.9" screen was certainly bright enough. If I'd been in the sun, though, I don't think it would have worked as well.
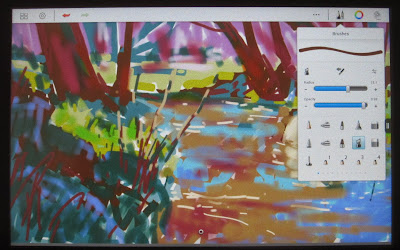 |
| Brush Tool Options |
My concerns about brush control and color-mixing options, however, were realized. The app doesn't have a simple paint brush. Oh, it's got every type of pencil you might want (all the way from 4H to 9B), airbrushes, pens, markers and funny little icon brushes, but not a simple paint brush. So, I chose a marker and an airbrush that seemed to make more painterly marks, especially with the soft-edged airbrush. This, and the half-hour I spent working rapidly, forced me to simplify shapes. That's not a bad thing, as you plein air painters know.
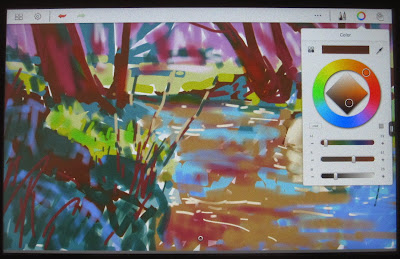 |
| Color Mixing Options |
As far as color, working with the app was rather like painting with pastels, especially some of those more garishly-colored sets. It was difficult to mix neutrals. My sketches are painted with the color palette of The Jetsons. If I'd had more time, I might have been able to "finesse" the mixing to get more neutrals. Changing the opacity of the brush tool - making it more transparent - allowed me to overlay color, rather like scumbling in pastel. This helped soften some of the intense chroma. The color selection menu does allow you to reduce and increase intensity, but I found the tiny circle in which you do that to be rather insensitive to my stylus. Overall, this forced me to simplify colors. Again, that's not a bad thing. Now that I'm in the studio, I can return to the sketch - just as I would with a plein air pastel - and refine it at my leisure.
So, what do you expect for $4.99? I feel I got a good deal, even with the app's drawbacks.
Will I keep using my Kindle Fire HD for plein air sketching? Probably. As with any medium, practice will only make you better. But I won't give it up for "real" paint and pastel - I still like to get my hands dirty.


