View in browser
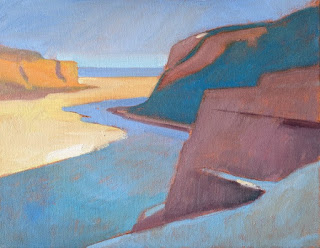
In the last post, I showed you how I created my 12x36 version of “Lake Ice.” In the post prior to that, I showed several different design possibilities, any one of which would have made a successful painting. But one I didn't show was a more square version, cropped to emphasize the lake itself. So without further ado, here is that version: “Lake Ice 2,” a 14x18.
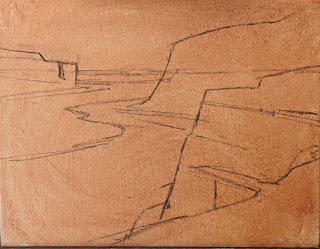 |
| Starting with14x18 stretched cotton, pre-primed with acrylic. I apply a thin wash of Gamblin's Transparent Earth Red. Although I don't always tone my panels--sometimes I like little bits of white to pop through, adding a scintillant effect to a sunny one scene--I always tone my canvas. It fills in a texture that is hard to fill later. I then use soft vine charcoal to outline my main shapes. |
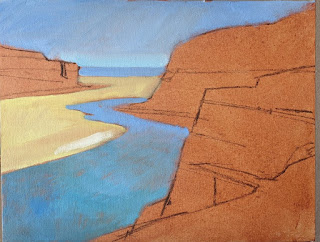 |
| Starting with a brush, I begin to block in my lightest values. I add a streak of pure titantium-zinc white to the sunlit lake ice to help me understand just how light my lightest value is. Everything else will be darker. I'm using cerulean blue hue (all paints are Gamblin) for sky and shadowed ice; yellow ochre for the sunlit ice. |
 |
| I begin to add the patch of snow in the foreground. It needs to be lighter than the shadowed ice in the distance, so I'm careful to note that on the canvas. I'm greying down the strong cerulean blue hue (which contains intense phthalo blue) with burnt sienna. |
 |
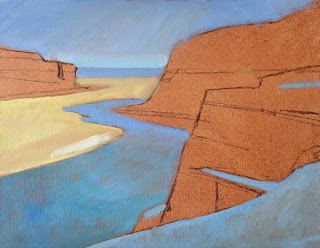
| I block in my distant shadowed tree masses on the cliff, making sure to get the value relationships right with the other shadowed areas. |
 |
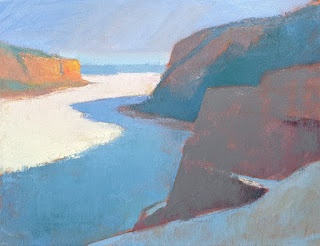
| Now I block in my rock colors--both shadowed and light--and again keeping careful track of the value relationships. This painting is all about the light, so these relationships are crucial. For my shadowed rocks, I'm using burnt sienna, cerulean blue hue, permanent alizarin crimson and white. For the sunny ones in the distance, yellow ochre brightened up with cadmium yellow light. Hints of greyed-down cerulean blue hue create the shadows on that distant promontory. |
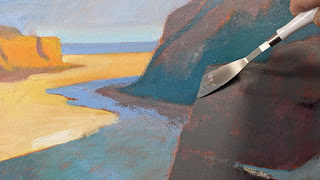 |
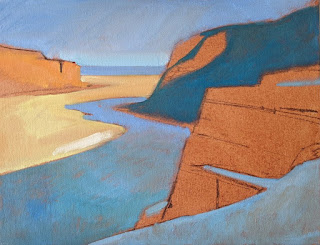
| At this point, with the entire scene blocked in, I put down my brush and move to the knife. This shape of knife gives me a nice sharp edge on the closest cliff. I continue to evaluate value relationships between my large masses, and I begin to adjust the color saturation of the foreground cliff, greying it down a bit. |
 |
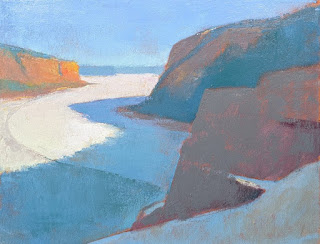
| Here's the first pass with the knives. You'll notice I've begun to "muddy up" the foreground snow on the cliff. It's a bit too clean for snow that's been sitting awhile. (I think the storm that laid down the snow was at least a month ago!) |
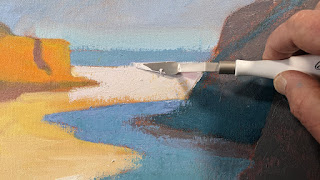 |
| More knife work, trying to get the icy feeling to the lake ice. This is a smaller knife that is good for tight areas. It's my favorite size and shape, even for large paintings. (Large being 12x16 or 12x24.) |
 |
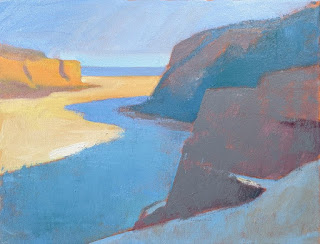
| More adustments, especially in the lake ice. |
 |
| I always like to have some sort of surface feature that runs from light to shadow. This helps show form. In a rock, it might be a crack. Here in the lake ice, I've added a "swoop," a nice curve that goes from light to shadow. This feature was actually there, but not quite so prominent. Sometimes the ice gets covered with a bit of snow, and the wind can blow it around, creating a pattern like this. This curve shows that the lake ice is not just flat but solid. |
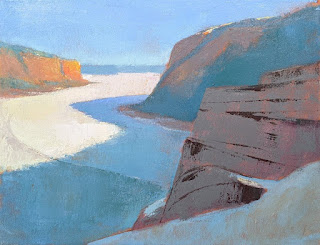 |
| Now I move to the foreground rock, adding the major cracks with a very dark mixture. This is ultramarine blue and burnt sienna. I vary proportions, depending on whether on want the mixture warmer or cooler. |
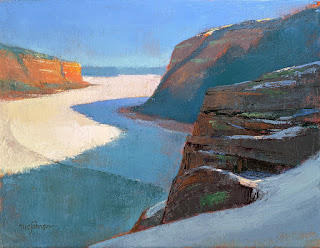 |
| Final state (also shown at the top of this post.) I continued to work on the foreground cliff, adjusting its overall value to a darker note, and varying the color within the mass. Little touches of snow on the cliff complete the painting. |

